Journal
"Birch leaves in a bottle" embroidery part two
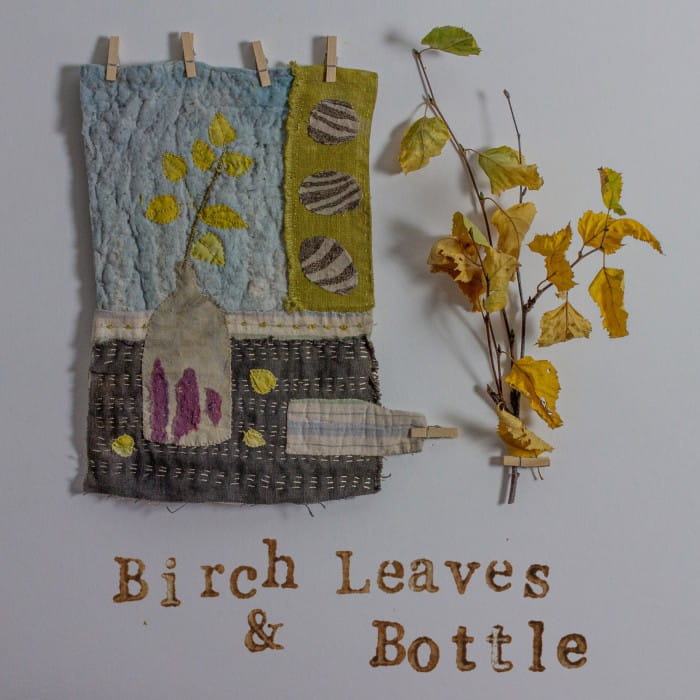
I finished the first of the embroideries that will eventually go onto the wall behind the kitchen table and it is now packed away in paper waiting for its eight companions.
I find that my creativity responds well to limits, to working within set edges. The edges for this project are mainly to do with materials - a mix of the pieces salvaged from the original tattered wool quilt and pieces of fabric dyed with plants from the garden here. There is also the possibility of adding in plant material - like the stem here - and maybe some bits and pieces like buttons I have inherited.
Nothing new though.
Start where you are, use what you have *
There is also a restraint in the size. As this is to be one of eight or nine embroideries to hang in a grid behind my kitchen table, though they don't have to be alike, they do need to fit into the same size frame.
The size of each piece of backing fabric is A4 (21 x 29 cm).
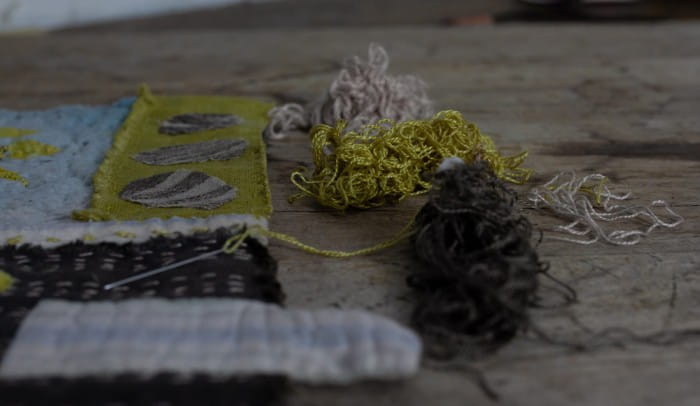
The fabrics are a striped flannel which was the backing of the quilt, wool pieces in various states of decrepitude which were the patchwork, a wool batting that was the padding for the quilt which is beautifully stained blue by the colour running at some point. Then I have a selection of linens and threads dyed with plants from the garden here - in the photo you can see threads dyed with birch, sweet cicely and alder cones.
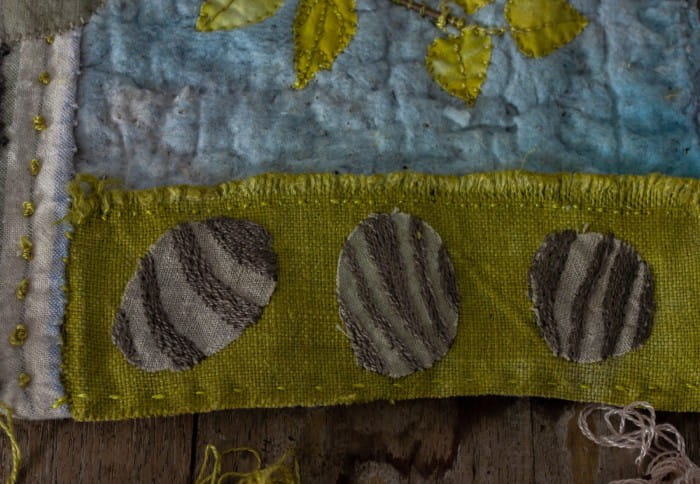
Running down the side of the embroidery is a strip of linen which I dyed in 2021 with the leaves of sweet cicely (Myrrhis odorata), the embroidery threads are recycled cotton dyed with the same plant a year later.
There are three banded pebbles - I don't know what the plant was - so many dye grey when modified with iron - but it is most likely to be dock. The thread is silk dyed with oak and iron.
I cut the pebbles freehand - laying them out like fuzzy felts until I was happy with the composition and then pinning them down. I first embroidered the curves of the bands in running stitch and then filled them in. The rest of each pebble is left raw, an effect I love.

I tried various options to make the stem of the leaves and did a lot of unpicking - in the end I used a piece of dried willow herb stem, putting it into the bottle and tacking it down with a dark green, dock dyed, thread.

*I always find that his quote from US tennis player Arthur Ashe "Start where you are, use what you have, do what you can" applies to all parts of life beautifully.
You may also enjoy …
Making tea-lights
3 years ago
Dyeing socks with acorns
6 years ago
Natural Dyeing with Hawthorn: Four Colours from One Tree
Natural dyeing with hawthorn leaves and bark, a step-by-step guide to getting four colours from one plant, including iron modification. Shot in Scotland.
4 months ago
Natural Dyeing: Flag iris root part two
dyeing wool with flag iris roots historic dye
4 years ago
 RSS
RSS