Journal
How to Dye Wool with Nettles
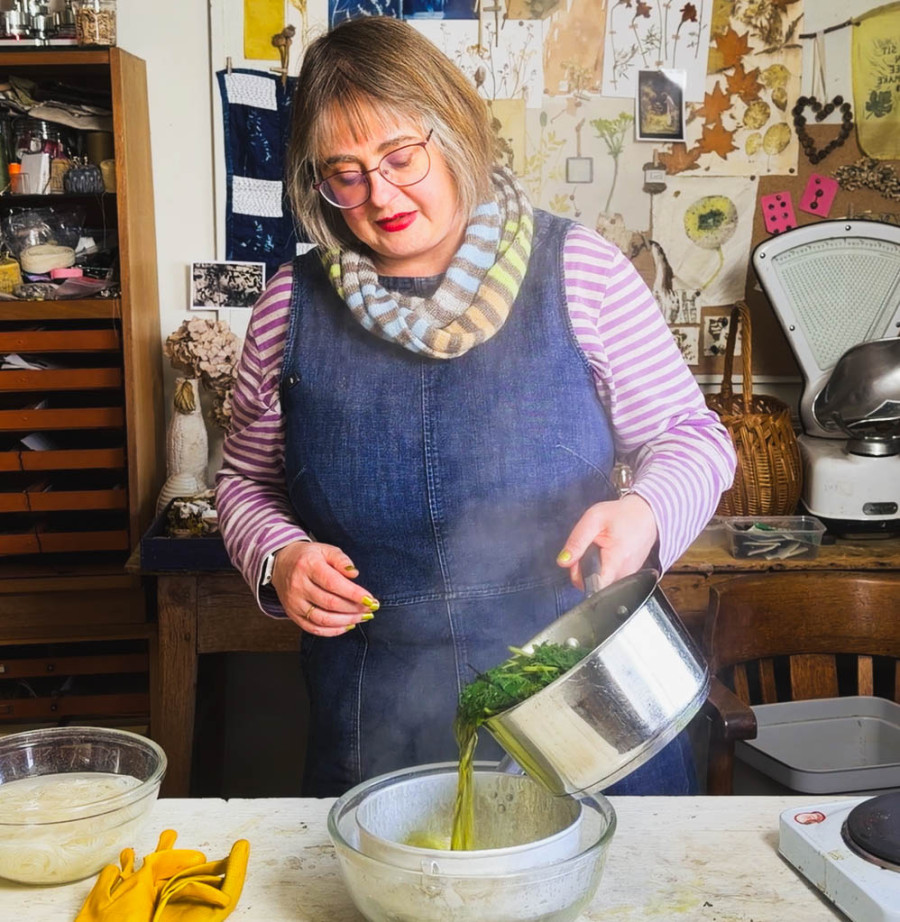
Nettles are one of the most useful plants in any dye garden, and one of the most underrated. They won’t give you a vivid, saturated colour. What they will give you is a soft, useful yellow-green that, with a quick iron modification, shifts into something really lovely: a pale pistachio, a grey-green, a colour that works quietly alongside everything else.
Here’s how I do it.
What you need
- Fresh nettles (I used 138g of leaves for 40g of wool, roughly 1:3 plant to fibre)
- Pre-mordanted wool (I used alum mordant - see the mordanting video in the playlist)
- A dedicated dye pan
- Washing soda
- pH indicator paper
- White vinegar
- Ferrous sulphate (iron) if you want to shift the colour
Gloves for picking the nettles. After that, once they’re in hot water, the sting is gone.
Step 1: Prepare the nettles
Pick your nettles and leave them on a path or flat surface for a few minutes. This gives any creatures a chance to get out before they go into the pan.
Add them to your dye pan. Don’t worry about packing them in perfectly.
Sprinkle over about half a teaspoon of washing soda. This is optional but useful: as the leaves boil, they tend to become acidic, and a small amount of alkali keeps things neutral. You don’t want an acidic bath for wool.
Pour over enough hot water to cover the leaves. I use a recently boiled kettle to speed things up.
Step 2: Simmer
Bring to a simmer, turn the heat to its lowest setting, put the lid on, and leave it for around 20–30 minutes. You’re looking for a bright, fluorescent green in the water. That’s your dye.
Don’t boil it for hours. The longer you go, the darker and duller the colour gets.
Step 3: Strain and check the pH
Strain out the nettles and compost them. Pour the dye liquor into a bowl.
Check the pH with indicator paper. You’re aiming for neutral; around 7. Because of the washing soda, it may read slightly alkaline (8 or above). If so, add a small splash of white vinegar, stir, and test again. Keep going in small amounts until you reach 7.
This matters. Wool goes into an alkaline solution and the fibre tightens up, the scales lift. It becomes harsh. You want neutral before your fibre goes in.
Let the bath cool until it’s hand-hot before you add your wool.
Step 4: Add the wool
Take your pre-soaked, pre-mordanted wool (it should have been sitting in plain water so it’s thoroughly wet through). Squeeze it firmly, submerge it in the dye bath, and let it go. Squeezing first pulls the water out and lets the dye in.
You’ll see colour taking immediately.
Leave it for a couple of hours. I don’t heat it further at this point, I just let it sit in the hand-hot water and work slowly. For nettles, I want to keep the colour as fresh as possible, so I don’t push it.
Step 5: Rinse (or modify with iron)
If you want a plain yellow-green: Lift the wool out, squeeze gently, and rinse in plain water until the water runs clear.
If you want pistachio green: This is where it gets interesting.
Make up a small iron bath in a separate container: about ¾ teaspoon of ferrous sulphate dissolved in cold water. Use different gloves for this; iron stains everything. Squeeze your wool out of the dye bath, submerge it in the iron bath, and watch it shift. You’ll see it moving towards green almost immediately.
Don’t leave it too long. You’re looking at wet colour, which will lighten as it dries. I usually take it out after a minute or two. A little iron goes a long way, and too much dulls the colour and weakens the fibre over time.
Rinse thoroughly after the iron modifier. More rinses than you think. Iron needs to come out completely.
The colours you’ll get
Plain nettles on alum-mordanted wool: a soft, pale yellow with a green tinge.
Nettles modified with iron: a pale pistachio, almost mint. The two colours together are really good; exactly the kind of neutral pairing that makes other colours in a project sing.
Both of these are useful colours. Not dramatic, not vivid. But quiet and versatile in a way that bright naturals often aren’t.
Here is a download of the instructions.
This is part of the Natural Dye Plants series. The mordanting wool video is also in that playlist.
A Maker’s Wardrobe: The Embroidered Waistcoat
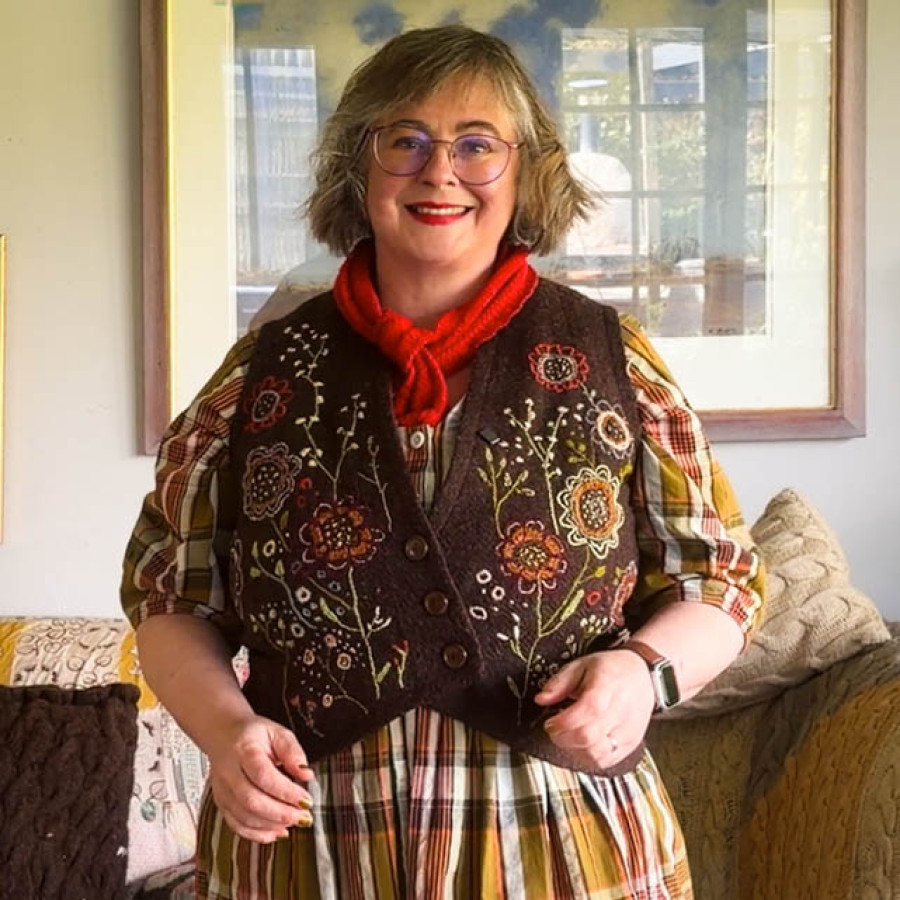
I bought this waistcoat when I was about 15 or 16, at a Phillips auction house in Edinburgh. It was the first of their fashion sales, built around a genuinely remarkable collection: Balenciagas, Chanels, the sort of thing that drew people in. Then around that core was everything else: the odd lots, the things that didn’t quite fit, the items that had come in when they announced the sale in the papers and people started clearing out attics.
I knew the people at Phillips well. My mum had opened an antique shop when I was about eight or nine, so I’d grown up in auction houses, going straight from school to help pack things into boxes, loading them onto George Street, knowing everyone by name. I think they were probably quite indulgent of a teenager with pocket money, because I managed to buy a number of those odd lots for less than a pound each.
This is why my collection of costume has some very peculiar things in it. Six Edwardian sleeves, none of them matching. That kind of thing.
The Waistcoat
The waistcoat came as part of a lot with a matching cape. It’s made of a very dark brown, open-weave Scottish tweed, bespoke-made in Mayfair, and beautifully constructed: unlined, with all the seams either finished immaculately or taped with silk ribbon, hemmed over by hand. Very simple lines. Asymmetric buttons at the front. Completely plain.
I bought it with some idea of turning into Katharine Hepburn. Very beautiful, very minimal. And then I never wore it. When I left home a few years later, it went into a case in my mum’s attic, where it stayed for decades.
When she started downsizing recently, it came back to me.
At 15, it was too big and boxy, giving me a very severe look. When I tried it on now, it was quite snug, and suddenly it’s a completely different shape. Simple still, but curved and fitted. I have genuinely grown into this waistcoat, which is a satisfying thing.
But it was still too plain for me. I kept trying it on with things and taking it off again. Something about it felt too heavy, too empty. Then I realised I’d been pinning a lot of Romanian and Bulgarian embroidered waistcoats on Pinterest, those densely worked folk pieces with flowers covering every surface. I thought: what if I tried something like that?
The Embroidery
I packed the waistcoat and a bundle of threads for a trip to Naples. I started with a white pencil, drawing flowers directly onto the cloth. No pattern, no plan, just drawing each flower as I went.
I don’t like symmetry. There’s something about it that makes me uncomfortable. With the asymmetric buttons, a symmetrical layout wasn’t really possible anyway. So I started with a flower here, a roughly corresponding one on the other side in terms of scale, and then filled everything else in around them.
The wools are leftovers, mostly from kits, things I’d accumulated. I added in some threads I’d dyed myself from the garden, a wool-silk mix, which is why they have a slight sheen. The stitches are all very simple: stem stitch, chain stitch, something approximating satin stitch, French knots, running stitch. Nothing technical. Just built up, and up, and up.
It might not be finished yet. I might add beading. But it’s in a state now where I’m wearing it, and it goes surprisingly well with a lot of things: checks, stripes, even florals. The layering of a dress, waistcoat, cardigan or jacket, and a scarf is something I love very much.
The Thing About Handwork
While I was stitching, I became aware of how much time it was taking. It’s enjoyable work, but it is a lot of time, and for something as small as a waistcoat front, that made me stop and think.
The things I’m naturally drawn to wear are things with colour and pattern and texture: embroidery, fair isle, lace, hand knitting. All of those take time. And if you love that kind of clothing and want to buy it rather than make it, you need to think quite carefully about what you’re paying.
When you buy something in a shop, 20% comes straight off for VAT. Then rent, staff, electricity, rates, marketing, styling: all of that takes roughly another 45% of what’s left. Every time there’s a middleman in the supply chain, another 50% of the remainder disappears. By the time you get down to the person who actually made the item, they’re seeing somewhere around 5 to 8% of whatever you paid. That applies from couture down through the middle market and on to fast fashion.
If you want the person who made a handmade piece to be paid a living wage, in safe conditions, the price has to be quite high. That’s not anyone being greedy. It’s just how the numbers work.
The alternative is vintage, which can also be expensive, but for good reason. Or you make it yourself, and in doing so, you also start to shrink your ideas about how many things you actually need.
What It Means to Choose Handwork
There’s a particular problem with a cheap embroidered item. If a piece of clothing costs £35 and has hand embroidery on it, the person who did that embroidery is almost certainly not being paid fairly for their time. If it’s priced as a disposable fashion item, it’ll probably be treated as one: worn for a season and then gone. The embroidery, which someone sat and made stitch by stitch, ends up in landfill.
Spend £350 on the same piece, and the maker might be getting £18. Still not a great deal, but you’re likely to treat it differently. You’re likely to keep it, mend it if it needs mending, think about passing it on.
Spend the time making it yourself, and the calculation shifts again. You know how long it took. You’re not going to throw it away. You’ll mend it, you’ll adapt it, and there’s a reasonable chance it’ll outlast you.
Those of us who love heavily decorated, layered, handworked things have to reckon with this more than people who prefer a minimal aesthetic. The things we want take either real money or real time, and if we try to get them cheaply, someone else pays the cost we should have paid.
The waistcoat took a lot of hours. I am entirely delighted with it.
Somewhere in my mum’s boxes there is also a matching cape. I haven’t found it yet.
This film is part of A Maker’s Wardrobe, an occasional series about the clothes I’m making, altering, and embroidering.
How to Mordant Wool for Natural Dyeing
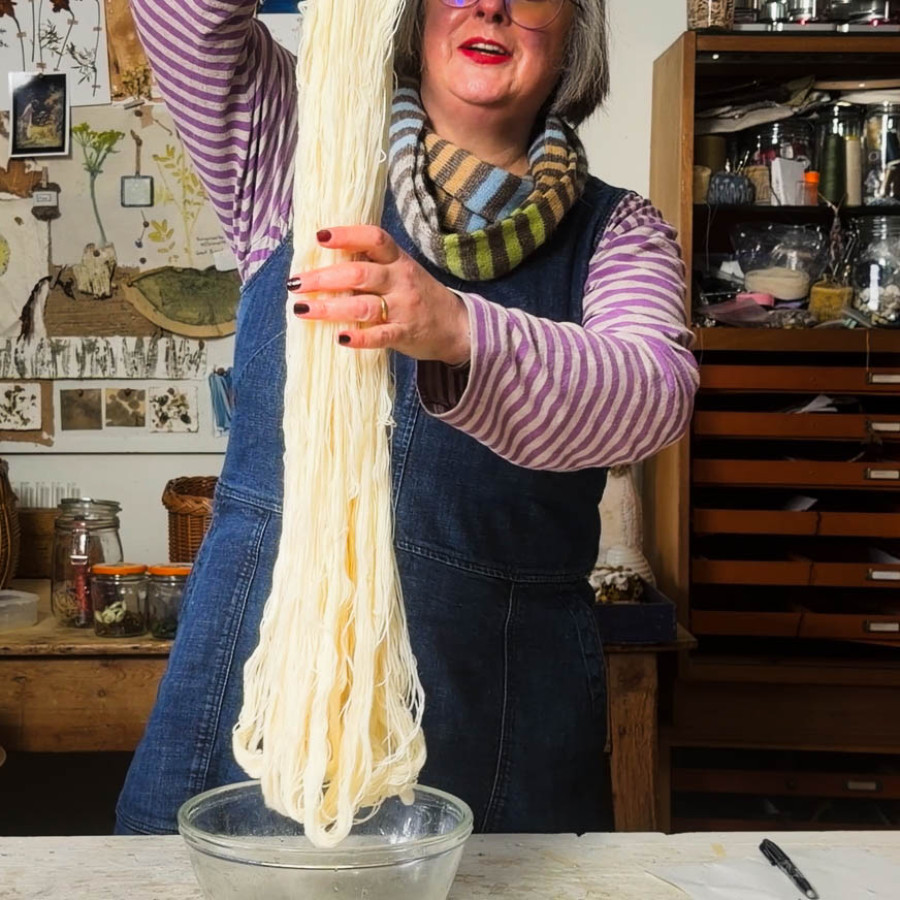
Mordanting is the single most important step in natural dyeing. Get this right and your colours will last. Skip it and they won’t.
A mordant works by forming a chemical bond with your fibres and with the plant pigment. Without that bond, there’s nothing to hold the dye in place. Sunlight, washing, time will all cause the colour to drift off. With a good mordant, you get results that are lightfast and washfast.
This is how I do it.
What You’ll Need
- Wool (any weight; I’m using 4-ply sock wool here, 10 mini skeins, 200g total)
- Aluminium potassium sulphate (alum), 8% of the weight of your wool
- Kitchen scales
- A small pan for dissolving the mordant
- A bowl large enough to hold your wool
- A way to tie your skeins together (I use reusable cable ties, but a piece of cotton thread works fine)
A Note on Alum
People sometimes ask whether alum is safe, or say they want to avoid chemicals entirely. It’s worth saying clearly: everything in this process is chemicals. The wool, the water, the plant dye. Alum isn’t dangerous by comparison with some of the alternatives.
Aluminium potassium sulphate has been used as a mordant for centuries. You’ve almost certainly already consumed it; it’s used in pickling and baking, and it’s common in natural deodorants. Compare that to rhubarb leaves, which are sometimes suggested as an alternative and which give off oxalic acid vapour. I’ve used them experimentally, but I wouldn’t use a lot of them.
In Scotland and elsewhere in the UK, club moss was traditionally used because it accumulates aluminium from the soil. It’s now endangered. Please don’t use it. It isn’t more natural or more eco; it’s just harmful to do.
Alum is reliable, well understood, and genuinely safe at the quantities needed for mordanting.
Step One: Weigh Your Wool
Before you do anything else, weigh your wool and write that number down. You need it to calculate how much mordant to use. If you’re using mini skeins, count them; each one is usually 20g, so you can do the maths that way.
I had 200g of wool for this batch. My mordant quantity is 8% of that: 16g of alum.
You’ll sometimes see recipes calling for 15% or more. You don’t need it. 8% is plenty, and using less is better practice all round.
Step Two: Soak the Wool Overnight
Tie your skeins loosely, loose enough for water to get through but tidy enough that they won’t tangle. Put them in a bowl of warm water (roughly hot-tap temperature), pressing them down gently until they’re fully submerged.
Leave them for at least 10 hours, ideally overnight.
Warm water helps the wool absorb moisture much faster than cold. By the next morning, the skeins will look noticeably plumper. That’s what you want; the goal is wool that acts like a sponge, ready to pull the mordant solution right through.
Step Three: Dissolve the Mordant
Weigh out your alum into a small pan. Add a little water and heat gently, stirring until every grain has dissolved. It’s similar to dissolving sugar for a syrup; you’re not boiling it, just warming until it clears.
I do this in a small pan rather than a large one deliberately. There’s no point wasting water or energy heating a big volume when a small one will do.
A separate little camping stove is worth having for natural dyeing generally. It keeps things away from your food preparation area (you should keep all your dye equipment completely separate), and in decent weather you can work outside, which is better. You want good ventilation when you’re heating mordants and dye plants.
Step Four: Add the Wool to the Mordant
Pour your dissolved alum solution into the soaking bowl. Give it a stir so the mordant is evenly distributed through the water.
Now take your skeins and gently squeeze out the water they’ve been soaking in. Not wringing, just a gentle squeeze, enough to create a little space inside the fibres. Lower the skeins into the mordant solution while still squeezing, then release. The idea is that they draw the mordant solution in as they relax.
Top up with water if needed to cover everything, and leave again for at least 10 hours, ideally another overnight.
Be gentle with wet wool throughout this process. It felts easily when agitated.
Step Five: Take the Wool Out
After its time in the mordant, lift the wool out gently (the ties or cable tie help here) and give it a gentle squeeze.
At this point you have two options.
If you’re going straight to dyeing: rinse the wool before you put it in the dye bath. There will be mordant particles that aren’t yet bonded to the fibre, and if you skip the rinse they’ll float around in your dye and give uneven results. A simple rinse sorts this.
If you’re storing the mordanted wool: hang each skein separately to dry completely, then store in a labelled box. Write down the fibre type, the date, and what mordant you used. You will not remember this later. I promise.
When you come back to use stored mordanted wool, rehydrating it before dyeing acts as your rinse anyway.
The Mordant Bath Afterwards
You may be able to reuse the mordant bath by topping it up with fresh alum. Whether it’s worth doing depends on how much mordant you think has transferred into the wool. At 8%, most of it should have been taken up by the fibre, so there may not be a great deal left. Use your judgement.
That’s genuinely the whole process. It looks more complicated than it is because of the chemical name and the waiting. But it’s mostly just: weigh, soak, dissolve, steep, dry. Each stage takes about five minutes of actual work.
I’ve written a step-by-step download that goes alongside this
Natural Dyeing with Sweet Cicely
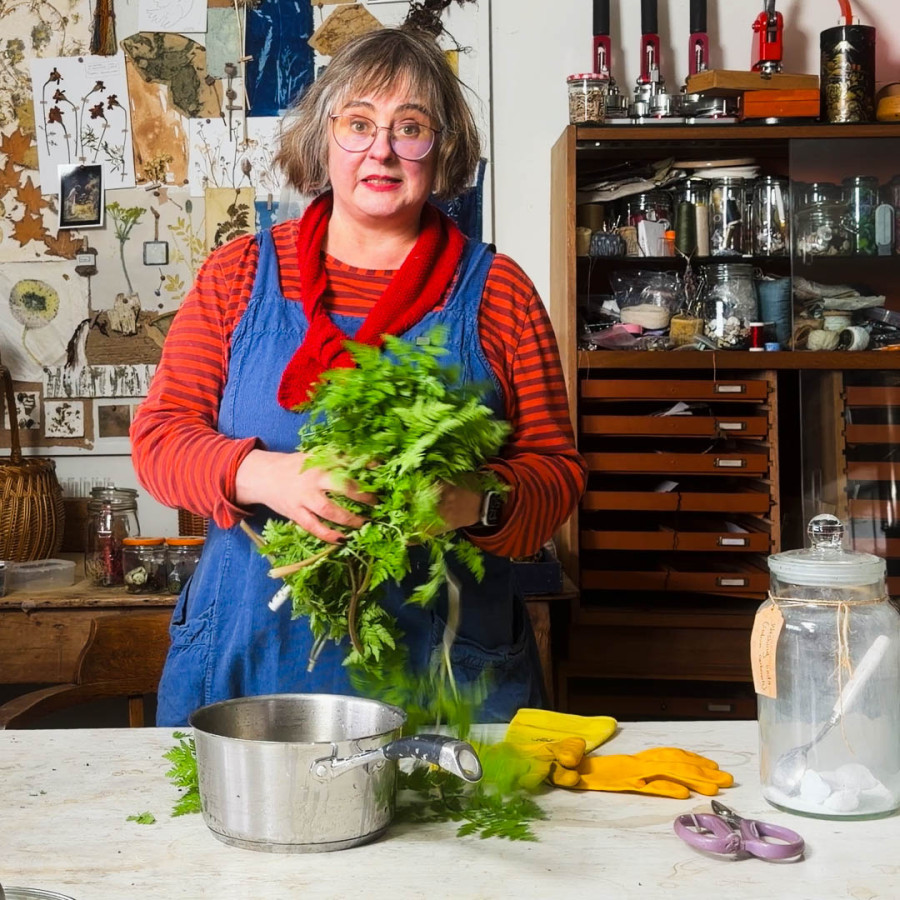
Sweet cicely (Myrrhis odorata) is one of my favourite dye plants, partly because it grows so well here in Scotland and partly because the whole studio smells of aniseed while you are working with it. It likes damp and shade and the shelter of hedges, and in this part of the country it does rather too well. I have a lot of it. Dyeing with it is one way of putting that to good use.
A bit of background
Sweet cicely is probably not a true native British plant. It most likely came over with the Romans, which would explain why it tends to be found near old settlements and buildings rather than in truly wild places. One of its old folk names is “the Roman plant.”
It has a long history of medicinal use. John Gerard wrote in 1597 that it was “very good for old people that are dull and without courage: it rejoiceth and comforteth the heart, and increases their lust and strength.” It was recommended for everything from babies’ colic to giving a general tonic to older women, and the roots and leaves were used as a blood purifier and wound ointment.
It was also used in cooking as a natural sweetener. The compound responsible for the aniseed scent, anethole, is sweeter than sugar, so sweet cicely was traditionally cooked with tart fruit like rhubarb and gooseberries to reduce the amount of sugar needed. During wartime rationing in the Second World War, people went back to foraging for it for exactly that reason.
Identifying it safely
If you are foraging for sweet cicely, please use a proper field guide with photographs and line drawings. Do not rely solely on an app.
The reason this matters is that sweet cicely belongs to the umbellifer family, the group of plants with umbrella-shaped flower heads. Some of its relatives can kill you. Hemlock is the obvious one. Sweet cicely itself is harmless, but you want to be certain.
The things to look for: the leaves are very soft and fern-like, not stiff or spiky. If you bruise them, they smell distinctly of aniseed. The leaves also have pale whitish markings near the base of the leaflets. Hemlock, by contrast, has a smooth stem often marked with red or purple blotching, and no aniseed smell.
Scent and colour
I have noticed that plants with strongly aromatic foliage tend to give good dye colour. Sweet cicely and fennel both smell of aniseed, and both give a bright, clean yellow. It is not a coincidence I think. The same compound, anethole, is responsible for both the scent and the dye potential.
Fennel may work better if you are somewhere warmer and drier than Scotland. If sweet cicely doesn’t grow near you, fennel is worth trying.
The method
This is a spring dye, which means speed matters. Early season leaves give the best colour, and you want to work quickly rather than simmering things for a long time. The fresher the leaves, the brighter the result.
What you need:
- As many sweet cicely leaves as will fit in your pan
- Washing soda (sodium carbonate)
- White wine vinegar
- pH strips or a pH meter
- Pre-mordanted wool or linen
- A stainless steel dye pan
Mordanting: The wool I used was pre-mordanted with aluminium potassium sulphate at 8%. If you want a video on how to mordant, leave a comment and I will make one.
Step one: make the dye bath
Strip the leaves from the stems and pack them into your pan. You want the pan fairly well filled but with enough space for the leaves to move around.
Add approximately one teaspoon of washing soda per large pan of water. The reason for this is that leafy dye baths tend to be slightly acidic, and the washing soda nudges the pH towards alkaline. What you are aiming for is something close to neutral. Add cold water to cover, put the lid on, and bring to just below a simmer. Keep it there for about 10 to 15 minutes. Do not boil hard and do not leave it for hours.
Step two: strain and adjust
Strain the leaves out into a large bowl or pan. Work fairly quickly at this point. Add cold water to bring the temperature down to hand hot.
Check the pH with a strip or meter. If the washing soda hasn’t been fully counteracted by the acidity of the leaves, the bath may still be on the alkaline side. You are looking for something close to neutral, around pH 7. If it reads higher, add a small amount of white vinegar, stir, and check again. Half a capful is usually enough. Do this somewhere well ventilated, as the reaction between the soda and vinegar fizzes and gives off fumes.
Step three: dye
Put your damp, pre-mordanted fibre into the dye bath while it is hand hot. If the bath were any hotter at this stage you could felt the wool, so check before the yarn goes in.
Leave for about an hour. The colour takes up quickly. You are looking for a bright yellow with a slight green quality to it, fairly fluorescent in good light. Linen takes up a similar yellow, slightly flatter than the wool but still good.
Rinse the yarn, hang to dry somewhere out of direct light, and leave for two to three weeks before washing. This settling period lets the dye pigments fully bond with the fibre. After that, wash in a pH neutral detergent.
What you end up with
A bright, slightly yellow-green. Not a dull yellow. This is one of the more satisfying spring dyes because the colour has a lot of life to it.
The linen came out well too. If you prefer to make sample books or dye cloth rather than yarn, sweet cicely works for that just as well.
A New Series: Dyeing with Plants
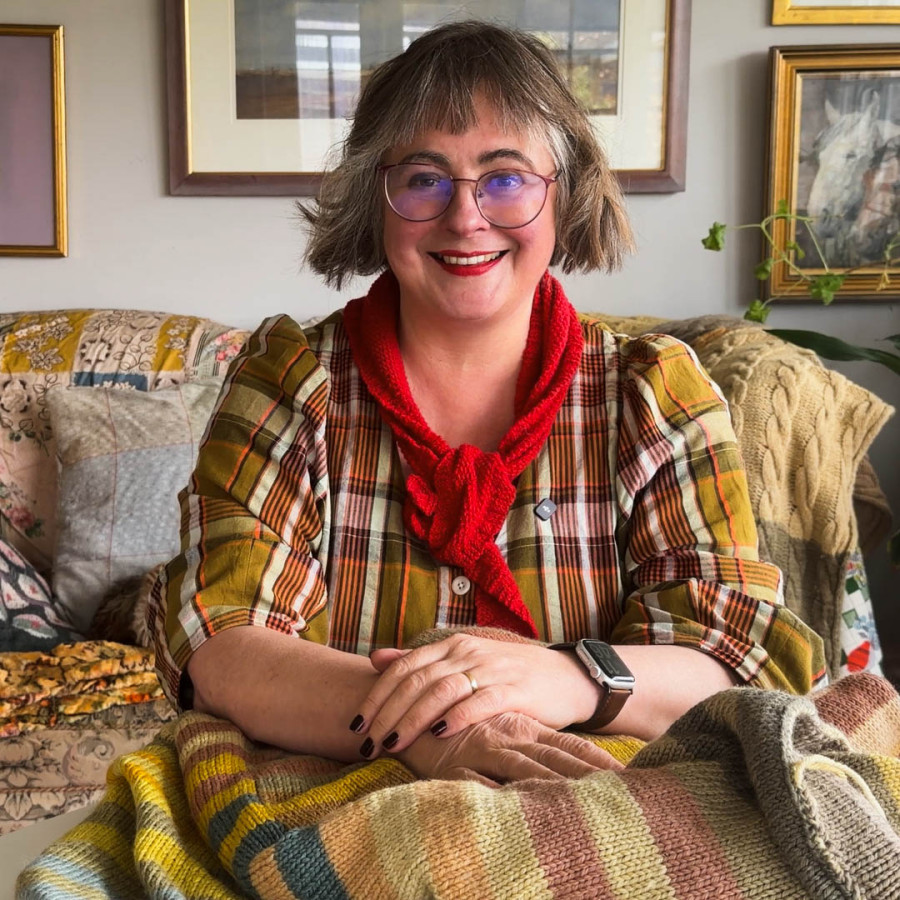
In 2000, I left my job as an art gallery curator, retrained in horticulture, and set up a cut flower business. I grew everything myself - every stem for every wedding, every bouquet sent by post, everything arranged for every event came from this garden in Stirlingshire.
There was one exception. A bride wanted roses at a time when I had none, and we compromised on English-grown ones. Two days before the wedding I got a call to say they’d actually be coming from Kenya. They arrived smelling of chemicals, stiff as sticks, wrong in every possible way against everything else in the arrangement. I never ordered anyone else’s flowers again.
That stubbornness is still here. It’s now just pointed at a dye pot.
What this series is
This is a series about botanical dyeing - specifically about what’s in my dye bath that week. Not a syllabus, not a planned curriculum. I’ll film what’s ready, what’s at its peak, and that’s what we’ll work with. If something is past its best when I get to filming, it waits for next year.
I am plant first, colour second. Most dyeing content starts from the colour you want and works backwards. I work the other way - I look at what’s there, what’s abundant, what’s ready, and I put it in the pot. The colour is what comes.
How I learned, and what I found out about my soil
I learned to dye with Debbie Bamford - the Mulberry Dyer, and a world expert on madder. After that first course, I dabbled for a few years, picking it up and putting it down. It wasn’t until I decided to make a jumper dyed entirely from garden plants that I became properly hooked.
That jumper now belongs to my elder daughter, who wears it a lot. It’s held up well.
I started building a dye garden, and fairly quickly discovered that you couldn’t get much worse conditions for one. We’re acidic, wet, and claggy. Most of the traditional dye plants - weld, madder, indigo - either failed completely or sulked. Dyer’s chamomile does two years here and then gives up. Other people complain it takes over their gardens.
So I did what anyone does when the textbook doesn’t apply: I ignored the textbook. I started thinking like someone who is outside the guild system entirely, way back in time, just looking around at what’s there and giving things a go. And as you can see from this blanket, there’s plenty of colour to be had.
(I do have some madder growing in the polytunnel. It won’t survive outside in my conditions, but I’m hopeful the tunnel will protect it. It takes four years to reach harvestable size, so this is a slow experiment. If it works, it will add orangey reds that I can’t currently get here.)
On taking plants
I don’t forage rare things. Everything I use is either grown here as a deliberate crop, or it’s what I’d call borderline invasive - the kind of plant where, if a thousand people came picking, there would still be plenty of it left. Nettles, docks, bracken. Plants that give without any worry.
What I won’t do is hunt something down because it gives a particular colour if you dig up the root. Roots aren’t forageable. And beyond that, there are so many colours that are just freely given by abundant plants - chasing a pink or a teal from something uncommon is unnecessary, and it’s also a way of exploiting what we’re supposed to be working with.
Resist the novelty. Rein it back. See what you actually have.
What the colours look like
The blanket I’m working on at the moment was started during lockdown. Mini skeins, each stripe a different plant, double-sided, knitted in strips. It’s almost finished - one more stripe to go this year. The colours have surprised me repeatedly. Things I expected to give very little gave a lot. The palette is much wider than people assume when they think about local, foraged dyeing.
The threads on the studio table - dyed embroidery threads from garden and local plants - are what years of this practice produces. There’s a full rainbow in them. No sense of making do, no muted compromise. These are threads worth stitching with, and worth selling.
That’s what plant-first dyeing looks like here, in this particular piece of Stirlingshire, on this particular soil.
What you’ll get from this series
Each film will be about one plant or group of plants - what they are, where I find them, how I use them, and what to expect in terms of colour. Because many of these plants have grown in Scotland for a very long time, there’s often history and folk use attached to them too, and I’ll bring that in where it’s interesting.
If you’re watching from somewhere with different soil, different climate, different plants - some of what I use won’t work for you. That’s fine. The point isn’t to follow my exact plants. It’s to find what’s abundant where you are, and start there.
 RSS
RSS