Journal
Regrading a 1944 Cardigan Pattern (and the Blocks That Got in My Way)
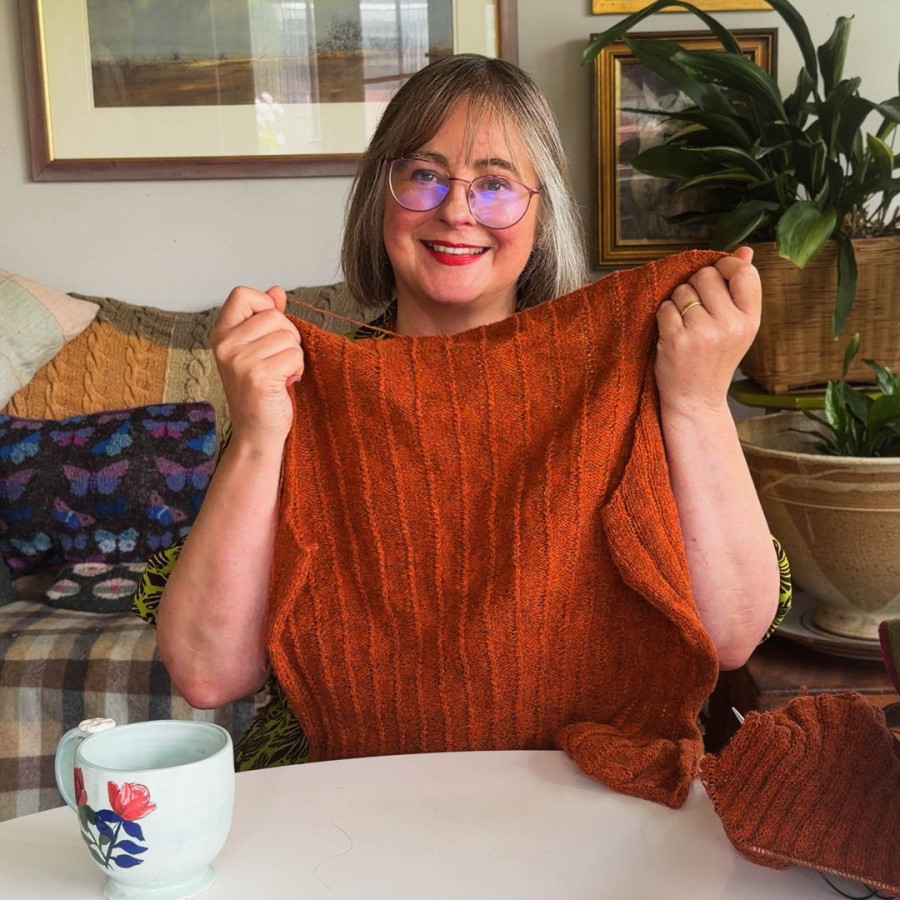
This week’s project came from a 1944 Vogue knitting pattern, the Wheatear Cardigan, photographed by Lee Miller. It’s a beautiful pattern. It’s also written for a single size, a 34in bust, in a yarn that no longer exists, in a gauge that doesn’t match anything I could buy.
If I wanted to make it, I had to regrade it properly. Not just knit it bigger. Regrade it, so it would actually fit my shape rather than a scaled-up version of someone else’s.
This is part of my maker’s wardrobe project, where I’m trying to build pieces that actually go with what I already own and wear. Here’s how the regrading worked, step by step, and the two things that nearly stopped me before I’d even picked up a needle.
What Stalled Me Before I Started
Before I get to the maths, I want to be honest about why this took over a week to begin.
The first block was measurement. I grew up in the 1970s and 80s, a properly fat-phobic time to be a teenager with a bust and hips. By the time I was twelve, random men were making comments to me in the street. I learned early to associate having a larger chest with danger, and to hide it. Decades later, the idea of getting out a tape measure and taking my own measurements froze me solid.
The second block was maths. I’ll happily tell people I’m no good at figures, despite having passed exams that say otherwise. Somewhere along the way I’d absorbed the idea that maths wasn’t for me, the same way I’d absorbed the idea that my body wasn’t the right shape.
Neither of these blocks was really about the cardigan. But they stopped me all the same, and I suspect I’m not the only one who finds old stories like this cropping up mid-project. If you’ve ever stalled on something for reasons that don’t seem to be about the thing itself, that’s what this was.
The way through, for me, was realising I didn’t need to measure my body at all. I needed to measure a jacket that already fits me. More on that below.
The Steps to Regrading a Vintage Pattern
1. Knit a swatch and get your stitches per inch
This is the foundation everything else sits on. I knitted a swatch in the actual yarn I was using, a dead stock lambswool, and worked out my real stitches per inch, not the tension quoted in the original pattern.
My swatch came out at 8 stitches per inch. The original 1944 pattern was written for 9 stitches and 10 rows to the inch. That difference matters enormously, so don’t skip this step or assume your yarn will behave like the designer’s. You don’t need to match the pattern’s tension as we are going to work out numbers completely anew. Concentrate on getting a fabric you are happy with.
2. Decide the size of the piece, in inches
Rather than measuring my own body, I measured an existing jacket that already fits me well and that I love wearing. I wanted a piece the same size as that one, not a piece based on abstract body measurements.
This mattered for two reasons. It sidestepped the whole tangle of anxiety around measuring myself. And it meant I was working from a garment I already knew worked on my actual shape, not an idealised or theoretical one.
For my back piece, I needed 26in of width.
3. Check for a repeat pattern and account for the stitch count
This is the step people miss when they just scale a pattern up or down. If there’s a stitch pattern with a repeat, your final stitch count has to be divisible by that repeat number, or the pattern won’t sit correctly across the piece.
For my cardigan, the rib pattern needed a number divisible by 9. So 26in at 8 stitches per inch gave me 208 stitches. That’s not divisible by 9, so I worked out the nearest number that was: 207 stitches (23 repeats of 9), losing one stitch overall to make the pattern work.
If you have a very obvious pattern you may also need to centre it.
Knitting pattern writers in the 1940s expected people to be able to do this kind of adjustment themselves. It’s a normal part of using a pattern, not an advanced skill reserved for designers.
4. Read the pattern properly to understand how it works
Before changing anything, I read through the original pattern carefully to understand its actual construction, not just its numbers. In this case, the back starts straight for three inches, then decreases one stitch in the centre of each rib every ten rows, several times, before increasing back out again towards the shoulders.
Understanding the shape the designer intended, and why the decreases happen where they do, meant I could adapt it deliberately rather than guessing.
5. Don’t just size everything up
This is the step that matters most, and the one a lot of regrading gets wrong. Making a pattern bigger all over assumes everyone is the same shape, just scaled. I’m not. My hips and bum are bigger than my bust, more of an hourglass with the sand settled at the bottom.
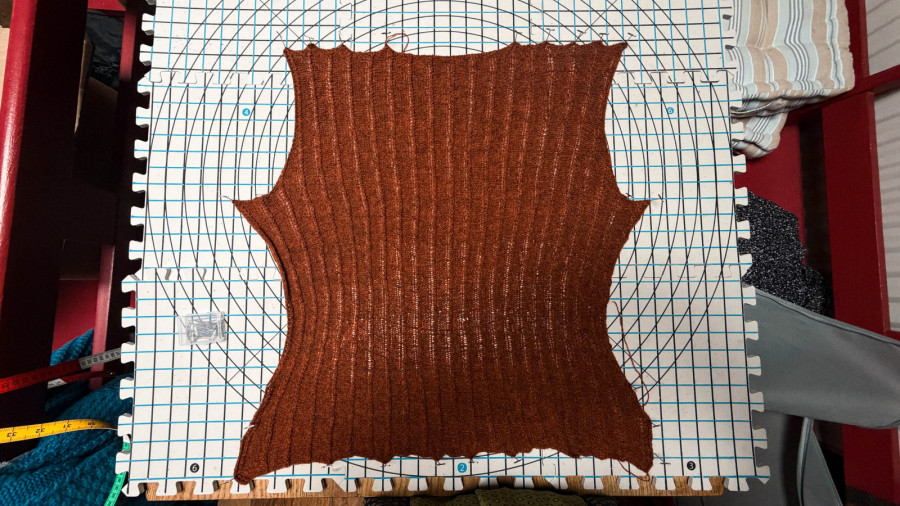
So rather than uniformly enlarging, I changed the shaping itself. The original pattern already increases more gradually than it decreases, every 20 rows on the way out compared with every 10 rows on the way in, which suited my hip curve well. What I added was an extra decrease stage of my own, bringing the waist in further than the original design, since my waist needed more shaping than the pattern assumed.
I also measured my shoulders separately, 17 inches, working out that translated to 136 stitches, since shoulders shouldn’t grow in proportion to hips just because the rest of the piece has.
Why This Matters Beyond One Cardigan
Once the maths was done, the process turned out to be straightforward. Step by step by step, not one big complicated leap.
What struck me afterwards was how much better we have it now. Test knitters today come in all shapes and sizes, and that’s taken for granted in a way it wasn’t in 1944. A pattern from decades ago having only one size feels like a product of its time. A modern pattern doing the same, or worse, doing “inclusive sizing” by simply enlarging everything proportionally on a kind of photocopier logic, feels like exclusion dressed up as inclusion.
Interestingly, of the vintage magazines I’ve looked at, Vogue tended to offer more sizes than something like Stitchcraft, which mostly kept to one. My guess is that Vogue’s readers were buying for aspirational fashion and hadn’t necessarily grown up knitting, so needed more built-in help, whereas Stitchcraft’s audience were assumed to already have the skills to adapt a pattern themselves.
Either way, those skills, reading a pattern properly, understanding repeats, adjusting shaping deliberately rather than scaling blindly, are worth having regardless of how many sizes a pattern gives you.
I’m about a third of the way through the first front piece now. The waist shaping, which doesn’t show in the original photograph, has turned out to be a lovely surprise. I’ll update you on how it goes.
You may also enjoy …
Collecting acorns at Loch Lomond
a walk to Loch Lomond to collect acorns for natural dyeing
3 years ago
Making produce bags for zero waste shopping
making your own produce bags for zero waste shopping
7 years ago
Make a pretty honesty heart
making a heart decoration
6 years ago
A 1920s Piano Shawl Dress tour
A silk shawl reworked into a dress, seam by economical seam. What the maker's choices reveal, and why it's now falling apart in my hands.
2 months ago
 RSS
RSS