Journal
Natural Dyeing with Buddleia: How to Get a Rich Gold from Garden Weeds
Buddleia is everywhere. Railway sidings, canal banks, waste ground, back gardens. Most people cut it back and compost the flowers. But those spent blooms, the ones you’d normally dead-head or prune off, will give you a warm, old-gold yellow on wool. No specialist equipment, no expensive materials, and you don’t even need to pick the flowers at their best.
That last part matters. The butterflies and bees get first claim. You wait until the flowers are over.
What You Need
- Spent buddleia flowers (fresh or dried)
- Pre-mordanted wool (I use alum mordant at 8% weight of fibre)
- A stainless steel dye pan
- A small portable stove if you have one
- Washing soda or bicarbonate of soda (optional but useful)
- pH paper (optional)
- Gloves
The mordanting is the non-negotiable part. Don’t skip it. Unmordanted wool will barely take the colour and what it does take won’t last. If you’re new to mordanting, I cover the process in detail in my dyeing with foodstuffs course inside The Studio.
The Process
Step one: prepare the dye bath
Fill your pan with hot water and add the flowers. Pull the petals from the stems if you want a cleaner bath, though it’s not essential. You’ll see colour beginning to leach out almost immediately.
Add a small pinch of washing soda. Less than a teaspoon for a medium-sized pan. This keeps the bath slightly alkaline, which improves the yellow and counteracts the natural acidification that happens when you simmer plant material. If you don’t have washing soda, bicarbonate of soda works. If you have neither, leave it out entirely. It helps, but it’s not critical.
Bring to a gentle simmer and leave for around 20 minutes.
Step two: strain and cool
Strain out the plant material. You want the bath to cool to hand-hot before you add the wool. If you put wool into a very hot bath it will felt. Adding a little cold water cools it down without diluting the colour, because it’s the dye pigment you’re after, the volume of liquid doesn’t matter.
Step three: add the wool
Squeeze your pre-soaked, pre-mordanted wool gently and lower it into the bath. Don’t agitate it. Leave it to sit for a couple of hours, then overnight if you can. The longer it sits as the bath cools, the more evenly the colour takes.
Step four: rinse and dry
Rinse well in water of a similar temperature, squeeze gently, and dry away from direct sunlight.
The Colour
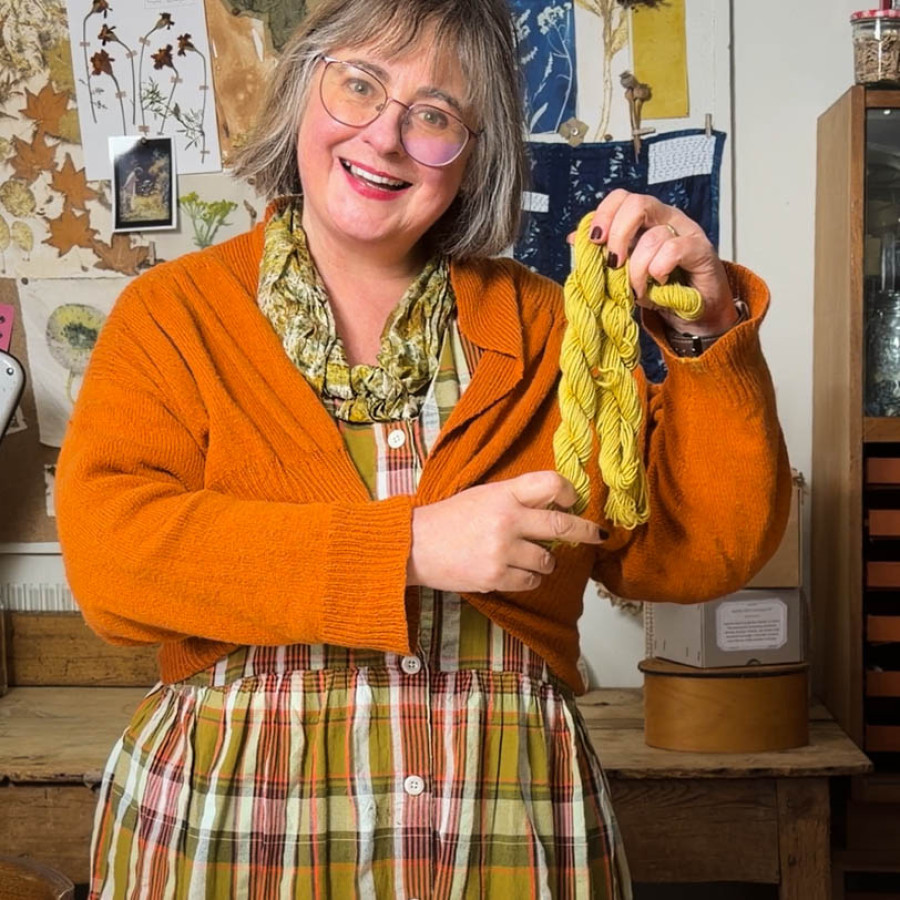
What you get is a warm mid-yellow. Not a sharp acid yellow, more of an old gold. The kind of colour you see in dried mosses and autumn grasses. It’s a colour that sits well with other naturally dyed fibres and doesn’t shout.
Buddleia yellow is reasonably lightfast in my experience, though like most natural dyes it will mellow over time rather than staying at full intensity.
A Note on Quantities
People often ask how much plant material to use. With foraged or garden plants there’s no fixed answer, because so many things affect colour: the soil the plant grew in, the weather that season, whether the flowers are fresh or dried, your local water. I had around 30 spent flower heads in this film, all dried, and got a good strong colour with plenty left in the dye bath.
If you’re getting a pale result, add more plant material next time. If you want to keep records of what produces what, note down roughly how much you used and your timings. But don’t let the absence of precision put you off starting.
When to Collect
You can use buddleia from late summer through to spring. Dead-head into a bag rather than the compost. Dry and store what you can’t use immediately, they’ll keep well in a paper bag in a cool dry place.
If you don’t have a buddleia of your own, look along railway lines, canal towpaths, and waste ground. In the UK it colonises these places readily. A word to councils and neighbours with the bush in a public space will often get you a bag of prunings without any difficulty.
This is part of my Natural Dye Plants series, where I work through the plants growing in my Scottish dye garden and the ones I forage locally. If you want to go further with natural dyeing, The Studio has courses, a community of makers, and a forum where questions like these get properly answered.
You may also enjoy …
Studio Exclusive: Dyeing with Willowherb: From Bright Gold to Charcoal
Rosebay Willowherb Dye Tutorial | Bright Yellow to Charcoal with Tannins Unlock the natural dye magic of willowherb—thanks to its unique tannins that yield vibrant yellow, shifting to deep charcoal with iron. Tutorial & history.
9 months ago
Dyeing with bloody dock (Rumex sanguineus)
3 years ago
Using pressed leaves to decorate gift wrap
pressed leaves decorating natural gift wrap.
5 years ago
Getting back to making clothes
starting to making your own clothes, freehand machine embroidery
4 years ago
