Journal
Making a peg bag
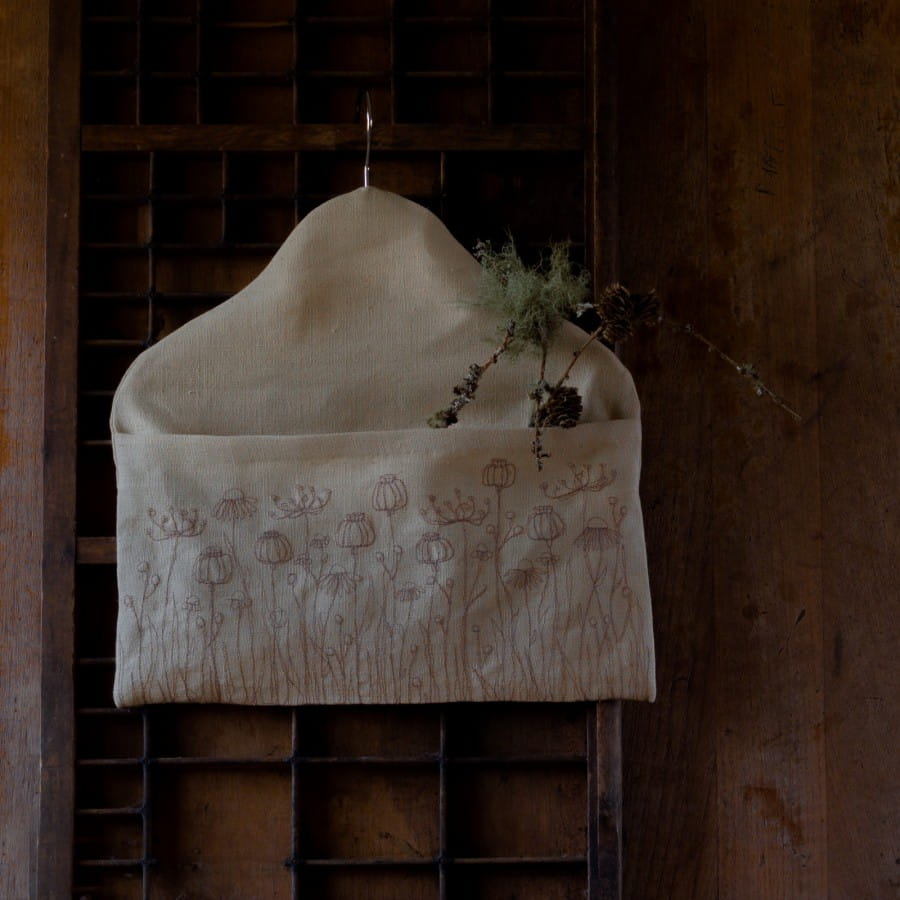
I was originally asked by someone to make a peg bag to replace their worn out one. I made this one, the pocket embroidered with a delicate meadow and I liked it so much that I made myself one and put a few extras in the shop.
The instructions here are for the basic structure - you can decorate the pocket in any way you like, or leave it plain.
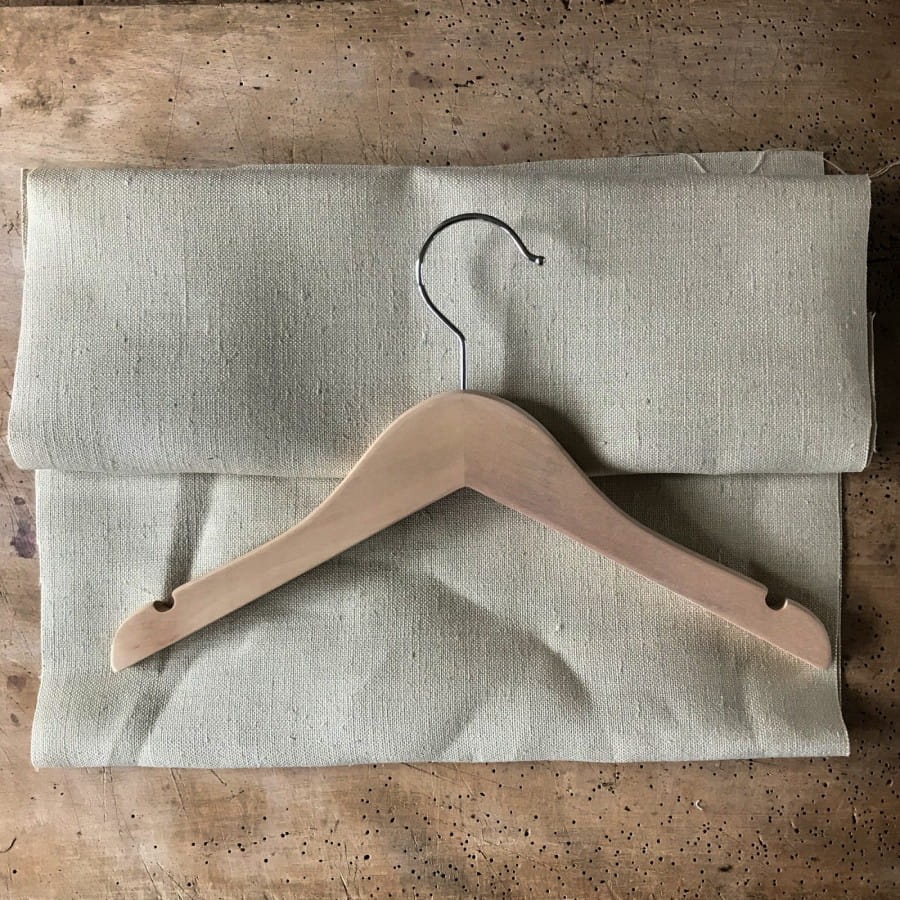
You need
- Child size wooden coat hanger
- Fabric 75 cm long and 4 cm wider than your hanger (my hanger is 32 cm wide and the fabric is 36 cm wide).
- Thread
- Needle
- Fabric scissors
- Sewing machine is optional.
Method
Cut your fabric into two pieces. One should be 54 cm long, the other 21 cm.
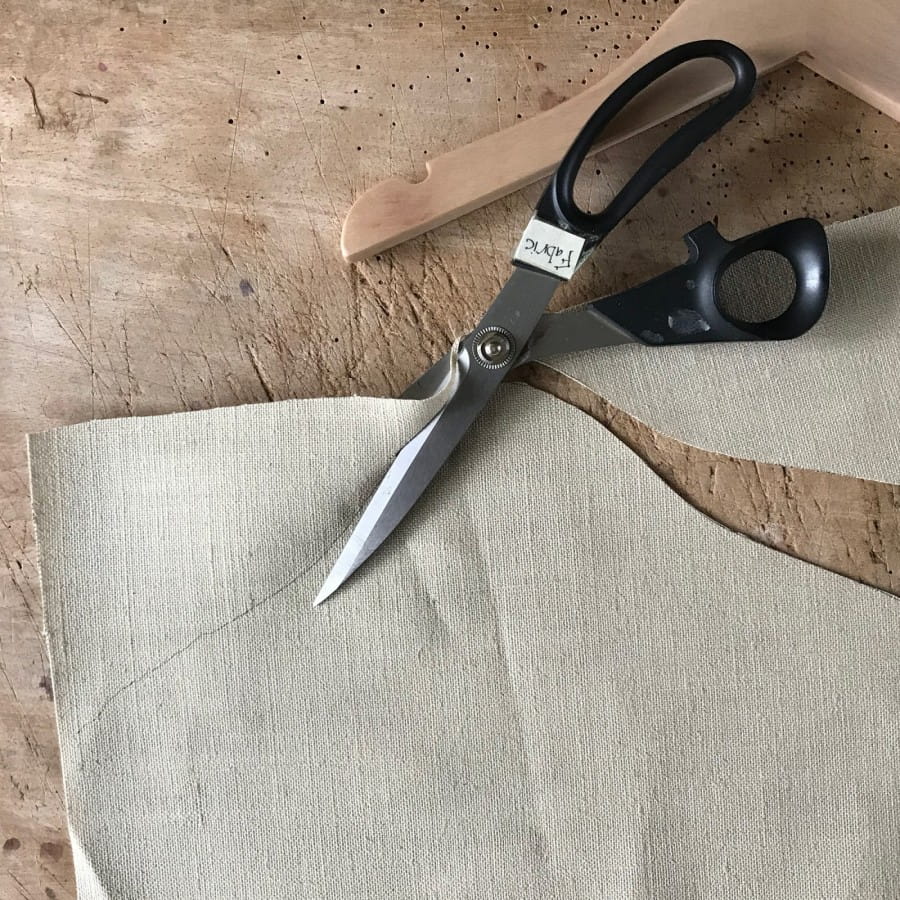
Lay your hanger on the top edge of the fabrics, hook above the fabric, and draw round the curve.

Cut round the curve and mark the central point.
Take the longer piece of fabric and measure 21 cm from the bottom - draw line, fold and iron a strong crease. This is the pocket.
Turn over the edge that will be the top of the pocket 1 cm and iron with a strong crease, then fold another 1 cm and iron again. You can either hand sew this hem or machine it. I hand hem, so that it isn't visible on the front.
 Decorate the front of the pocket in whatever way you like or leave it plain.
Hem the bottom edge of the shorter piece of fabric.
Fold the long fabric inside out so that the right side of the pocket faces the right side of the back, pocket side upwards. Then place the shorter piece over it, right side down, matching up the curves at the top.

Pin the pieces together, start 1/2 cm from the centre top and then sew right round the outside edge to the base with a sewing machine or a small running stitch then do the other side in the same way leaving a gap at the top for the hook.
Trim any excess fabric at corners. You can zig-zag or overlock the edges at this point if your fabric is prone to fraying.

Turn the right way round, make sure the corners are neatly turned out and press firmly with an iron.
Put hanger in the bag, putting the hook through the gap in the top. If the fabric pokes out the top carefully push it back with a large needle - you can also re-inforce this with small running stitches worked round the hole.

You can learn how to do the freehand machine embroidery in my e-course "Introduction to freehand machine embroidery" which takes you from basics to being able to draw with your sewing machine.
Share to Pinterest

You may also enjoy …
Making daisy balm
How to make a soothing daisy balm for bruises
5 years ago
Elsa Schiaparelli’s knitwear and the women who made it possible
The story of Schiaparelli's early knitwear and the women described as socialites who were, on closer inspection, doing something rather more significant than that.
2 months ago
Making a dogwood wreath
making a heart wreath with dogwood prunings and dried flowers
6 years ago
Making a Knitted Soap Saver
free patterns for making a soap saving mitt
6 years ago
