Journal
Make your own box loom
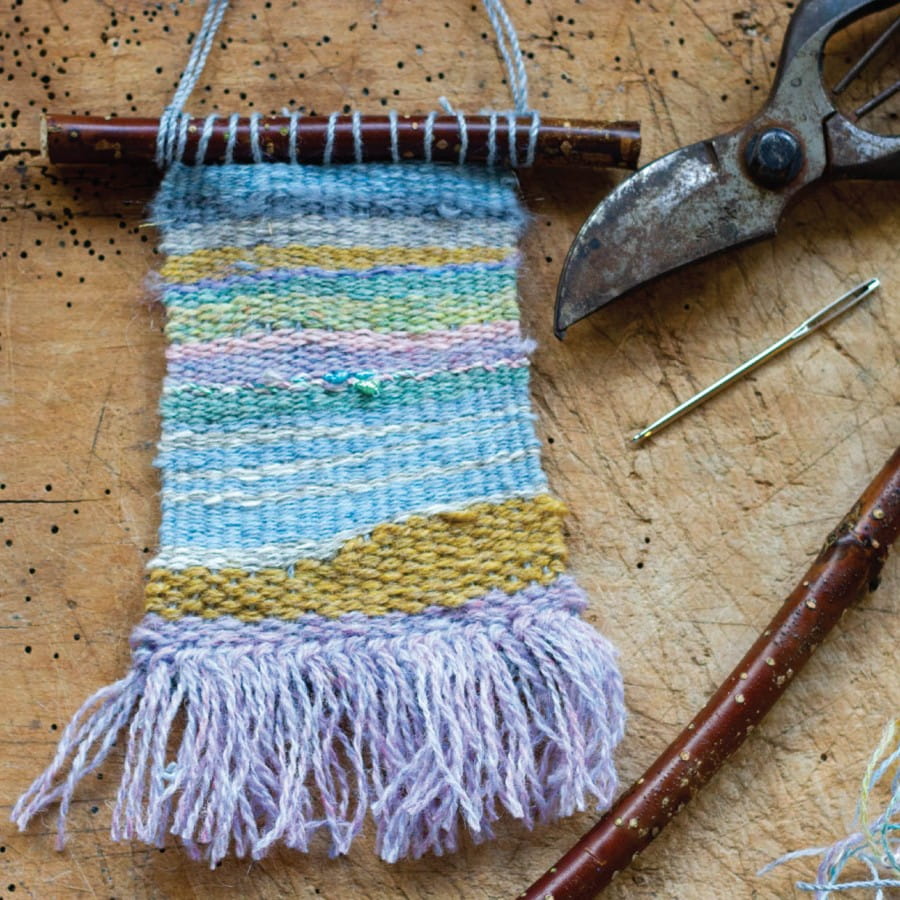
Making a box loom was the last Studio Box and usually I wait a few months to put instructions up on the blog, but I thought that making a box loom would be something that lots of people could do - whether they are looking for something simple and creative to do themselves or are entertaining children inside.
1 - What you need
- Single walled cardboard box - a large shoebox will work as will any of the boxes that my kits and gift sets are in. The card has to be strong enough to take a tensioned warp (the vertical threads) and easy enough to cut slits into.
- Ruler to measure out the slits
- Tape to reinforce the slits
- Strong yarn for the warp
- Spacer, something to create a space at the bottom of the loom (another piece of card cut slightly wider than your threads works)
- Materials to weave with - if you don't have yarns, cut up plastic bags work, as does long grass and strips of fabric
- Large eyed needle - this makes it easier to get the yarn through the loom
- Fork to squash the weaving down
- Scissors
- Stick or pencil to hang the finished weaving.
Make the loom
Use your ruler to mark lines at 0.5 cm spacing right along one edge of your box. Then mark the same spacings on the opposite side of the box.
These need to match each other so make sure you start at the same point on each.
Use scissors to cut 1 cm deep slits as each mark.
Run tape right around the box at the bottom of the slits to reinforce them.

Threading the warp.
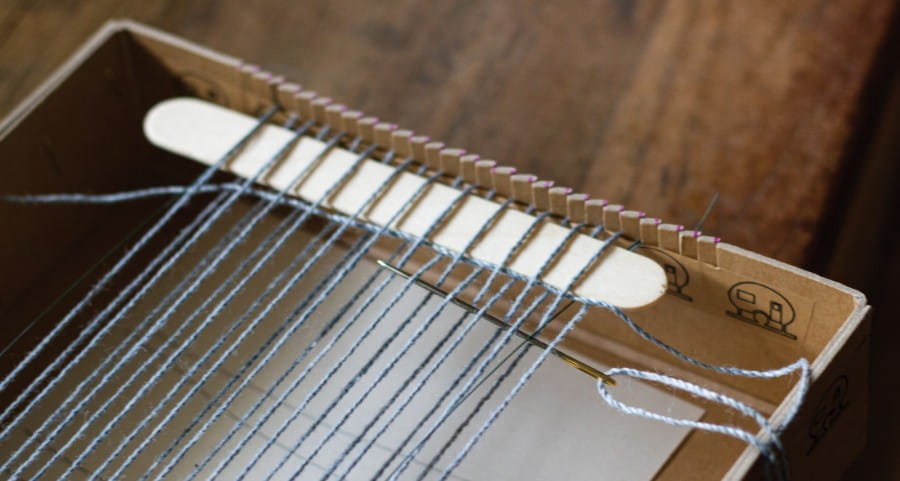
Take your warp yarn, secure it in a slit at the bottom of your box, about 3 cm from edge, and then take it up and down the box between the slits so that you have parallel threads, 0.5 cm apart across your box. Stop about 3 cm from the other edge (so you can get your fingers in to weave.
Put your spacer at the bottom of the loom, threading it under and over the warp.
Begin weaving.
Take some yarn, thread your needle and begin to weave, under and over for the first row, over and under for the second.
Weave 3 rows and then gently squash down to the spacer with your fork.
Weave 10 rows in total.
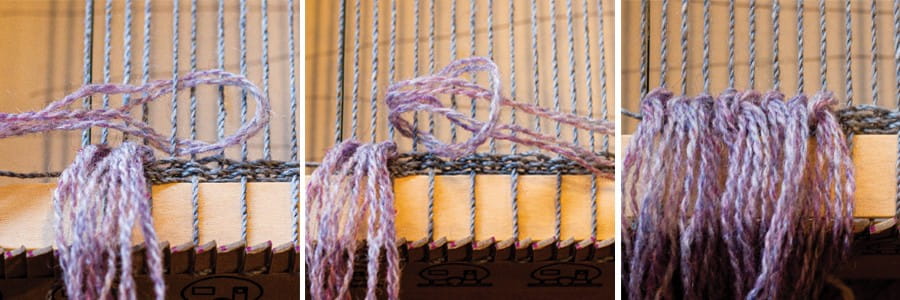
Making tassels.
Cut lengths of yarn 4 times the length of the tassels you want.
The tassels are made sideways round the warp threads and then gently turned vertically - see the photos.
You can make several layers of tassels if you like and can trim them into shapes when you have finished.
If you are using grasses then just omit the tassels.

Weaving
Thread your needle and begin weaving in the centre of the back (this means that the ends are hidden) - alternate over/under and under/over rows and squash yarns down every few rows.
End each colour by taking the needle to the back and leaving a training end.
You can create shapes by making short rows of colours - when the. weaving is all filled in and you have squashed it down you won't see gaps.
Unless you deliberately want vertical slits make sure that you interlock the weaving at the edges of your colours by making sure that they overlap slightly.
Stop weaving about 7-10 cm from the top, so you can secure the threads.

Finishing off - bottom edge
Carefully remove the weaving from the box loom and turn over.
Remove the spacer and knot the pairs of threads together so that the weaving is secure. The tassels will hide these.

Finishing off top
Thread stick through the loops at the top and carefully cut each loop and tie it tightly to secure the stick to the top of the weaving. You might want to make the knots at the back of the stick so they are hidden.
When you are confident that the stick is secure trim the ends. You can also trim all the hanging threads at the back of the weaving at this point.

Making hanger
Create a hanger for your weaving by attaching yarn with slip knots at either end of the stick and then knotting together at the top - make sure the stick is hanging horizontally when you tie the yarn together.

I would love to see how you get on - let me know - Instagram is @snapdragon.life or on the Facebook page.
You may also enjoy …
Knitting from a 1944 Vogue Pattern: What I’m Making Next for My Maker’s Wardrobe
I'm planning my next cast on from Vogue's 25th Knitting Book, published 1944. A wheat ear rib cardigan, one size, photographed by Lee Miller, with a lot of maths to do before I can start.
1 month ago
Growing and Drying Calendula
growing and drying calendula flowers for herbal balms
5 years ago
Dyeing cotton yarn with nettles
How to dye cotton yarn with nettles, natural dye
5 years ago
Plantain and nettle balm
Plantago lanceolata history and use, ribwort plantain, balm recipe
6 years ago
