Journal
How to grow wallflowers
Wallflowers have a special place in my heart. When I catch that sweet, almost orangey, scent I am transported back to sitting on a front door step in my Grandad Clark's garden - rows of bright wallflowers under the roses.
He bought them as plants - slimy roots wrapped in newspaper, their only scent at that time a cabbagey whiff of decomposition.
Decades later - when I was making my first garden - we visited Monet's garden at Giverney. There I was bowled over anew by wallflowers, great blowing cushions of wallflowers in amongst bright tulips under espalier apple trees in blossom. It was the most beautiful thing I had seen, the flowers were like watercolour washes and their ample flowers filled in all the gaps between the tulips - a swirl of colour and texture.
So, though my memories of wallflowers are of my Grandad, the way I plant them is more an emulation of Giverney than the straight lines of a 1970s North East of England front garden.
And to get that - to get the tall, mottled, glowing flowers you really need to grow from seed. They aren't varieties that make it to the garden centre.
Wallflowers are biennials - or more accurately short lived perennials that are most commonly grown as biennials. That means that you sow the seeds in May, they do most of their growing between May and November, they hunker down and don't do much over the winter and then, when the weather warms up in the spring, they burst into flower.
I think it is this feeling of "2 years to grow" that means they are not a popular plant to grow from seed.

Choosing a variety.
There are 2 main types of wallflowers - bedding and cut flowers varieties. The main difference is in height - bedding ones grow to about 12-15 cm and are ideal for filling in-between other temporary spring plants. You will see this type in a lot of parks and civic gardens. The cut flower varieties are much taller - about 30-40 cm - and ideally they should be staked in some way or they topple over.
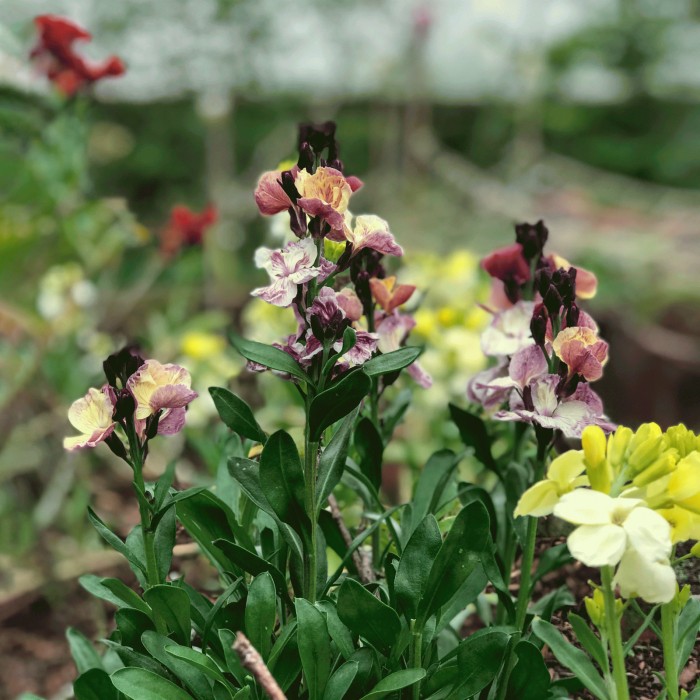
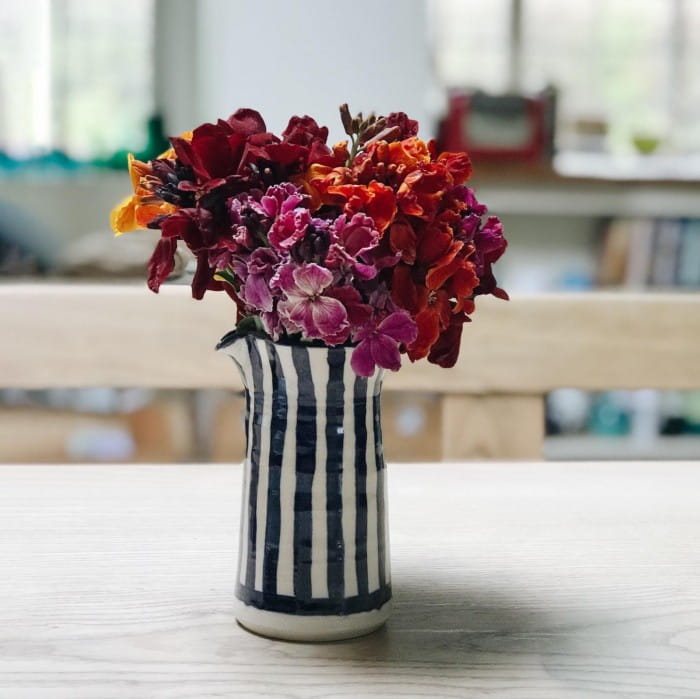
My favourites are the cut flower varieties in subtle mottled colours - Sunset apricot (middle photo) is a mix of apricot, peach and slightly raspberry tones, Sunset purple is a cream and purple wash (in top photo), Fire King (in jug in bottom photo) is a wonderful mottled orange which seems to go with everything.
I have found that there is a fair amount of variation in the sunset varieties in particular - but personally I like that as it stops it looking too uniform.
Sowing seed.
If you have a nursery bed, you can do it the traditional way start off wallflowers there, grow them on and transplant to their final flowering position in late winter. Make sure that your soil is alkali - or rake gardener's lime into it before you plant.
Otherwise sow seeds finely into a seed tray of multi-purpose compost, cover with a fine layer of compost or vermiculite and leave to germinate. Like most brassicas they germinate fast and should be up in 5-10 days.
When they are sturdy seedlings with at least 4 leaves, prick them out into modules or small pots. Mix a couple of handfuls of gardeners' lime into your potting compost to make it alkali.
Growing on.
I find that my garden - in central Scotland is a bit too wet and windy for wallflowers to be happy outside over winter in their first year. I tend to plant them into large pots and keep them somewhere sheltered until it is time for them to go into their final position. Next year I am going to put some temporary mini windbreaks along the tulip border as I think that, where I lost plants, it was because of the wind.
Anywhere that you are going to plant wallflowers should be alkali - they do not like acid soil at all - sprinkle lime where you are going to plant and rake in well. They are perfectly happy in poor soil - indeed will grow in the lime mortar of walls - so are perfect for anywhere in your garden that may suffer from builders rubble!
Most of the plant's growing will have been done in the summer and autumn of their first year, so you can plant them out quite close together when you put them in their final position. They traditionally used to be sold bare root in twists of newspaper which shows how tolerant they are of replanting.
Next year.
Though many people grow wallflowers as biennials - chucking them out after they have flowered - they are in fact short lived perennials and will live for 4 or 5 years in many gardens.
If you don't want them to remain where you have had them for their spring show - and it must be said that they are not the most attractive plant in the summer/autumn - then you can cut off all the flowering shoots and dig up, storing them temporarily in another part of the garden until they are needed again.
Cut flowers.
Wall flowers are wonderful cut flowers as the heat indoors magnifies their scent. They are the perfect 'filler flower' to put in between tulips and narcissi, but I also love tight massed bunches of them alone. Together they look like old faded velvets and silks.
Pick the stems into a bucket of water, strip all the leaves, sear the stem ends in boiling water for 20 seconds and then leave in a loose bunch in a vase of tepid water to condition.
Arrange in a vase or jug that is not transparent - they are from the cabbage family and the stems do not look attractive after a few days in water!
For more tips, get my free guide to cut flowers by signing up for the newsletter below.
You may also enjoy …
Scampston Hall Gardens
Tour of Scampston Hall Gardens, Yorkshire, Piet Oudolf
4 years ago
How to store seeds
how to store seeds long term for successional planting
8 years ago
Grow your own salad leaf mix
growing salad seeds in pots
6 years ago
Snakeshead fritillaries - my favourite spring meadow plant
growing a fritilaria meleagris snakehead fritillary meadow
8 years ago
