Journal
Making Embroidered Pillowcases -
Making things for people I love is very important to me.
I love the process, sitting and quietly thinking of the person, the joy they bring to my life, happy times, sad times.
I also have a bit of a problem with works in progress - my creative eyes are too big for the time available, reproachful bags of half finished projects are stuffed into all my cupboards.
I remember, as a teenager, reading a magazine article about the actress Jane Seymour who - flying home from the States to visit her father who had been admitted to hospital - spent the flight embroidering a pillowcase for him.
A practical and emotional mix of meditation and concentration, hands busy, mind free to remember and feel.
A token of love and, in some ways equally important, a project that can be finished in a small amount of time.
Unlikely to join the rest of the unfinished things.

My eldest daughter is leaving for University in September - she has been living away from home for a couple of years so it isn't exactly flying the nest, but she will be further away.
I won't be able to text her to meet for a coffee, I shall have to book a train.
It gives me such joy to see her grow and thrive, to head out into the world and be independent.
It fills me with terror too - especially this week.
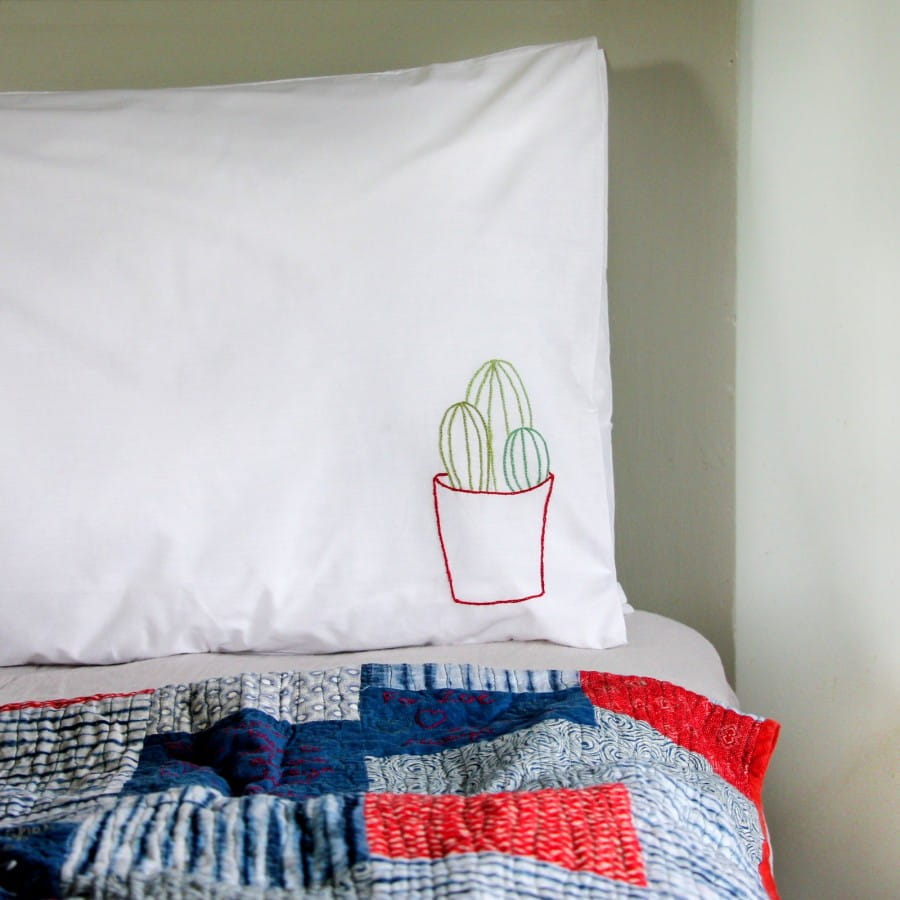
So I have been embroidering pillowcases for her - simple bright cacti and succulents, to fit with her collection of plants - my drawings transformed into thread - a reminder of home.
I suspect it is a in some ways a charm too - a physical embodiment of the loving thoughts that made it - a feeling that it will protect her in the new life that she is soaring into.
The instructions are below -

YOU NEED
- Cotton pillowcase
- Saral Wax Free Transfer Paper - Graphite
- Pencil
- Threads
- Needle
- Simple Line Drawing
Put your pillowcase on a flat surface and put a piece of Saral paper and the drawing on top, wherever you want the motif.
Trace round the drawing with a pencil - press firmly to transfer the design to the pillowcase.
Thread your needle with 2 strands of embroidery thread (the skiens have 6 threads twisted together so you need to split them in three), knot the end and start to follow the lines of the drawing using chain, back or stem stitch.
There are great how to videos on YouTube if you haven't embroidered before - these three stitches are very easy.
You can use an embroidery hoop for this - which will keep the design taut - but I never do. I just iron a little more firmly when I've finished.
When you have finished all the lines make sure the ends of the threads are secure, trim any long threads and iron on the back.
You can also write messages in the same way - just put a piece of paper on top of the Saral and write your message, then follow the line of your writing with thread.
My drawings of cacti are in the Members Area as downloadable PDFs and I also have a very limited number of packs available at cost to members with a square of Saral paper, 3 colours of thread, a needle and a print out of the cactus drawing.
All you would need is your own pillowcase.
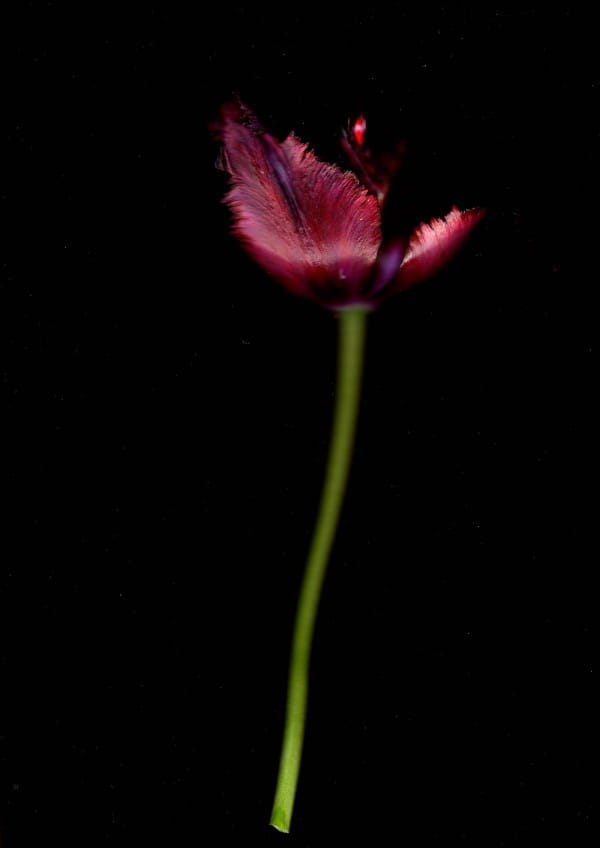
Scannography
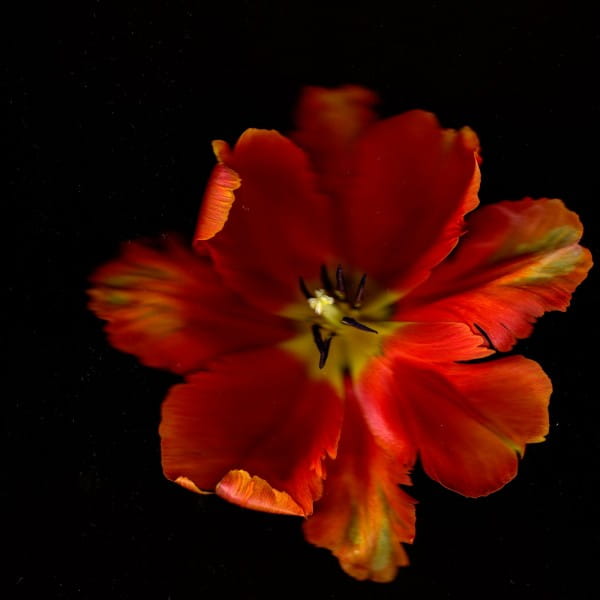
Last week, clearing out some old issues of Gardens Illustrated I came across a photo by Isabel Bannerman of a parrot tulip taken on a scanner.
It looked like it was fairly simple - and the ideal thing to try with our large gift boxes - so I decided to have a go.
First I picked some gorgeous orange parrot tulips and placed them onto the glass of our office scanner (this is an Epson Workforce printer - cheap as chips)
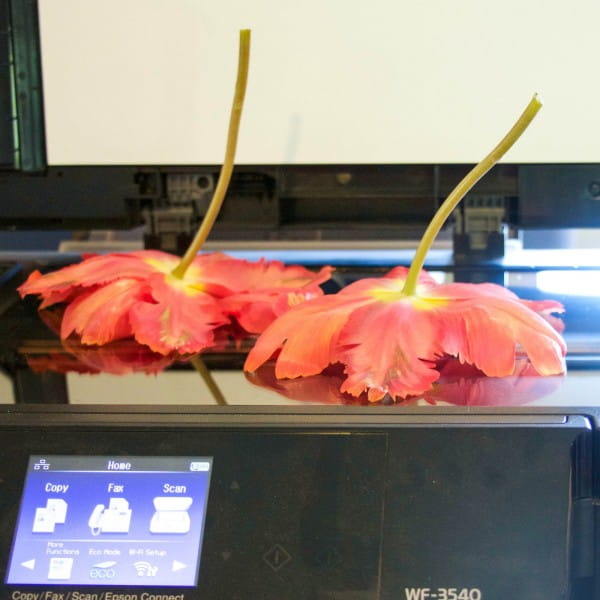
Then I put our largest size gift box over it (to be honest any box that doesn't let light in would work but it helps if it is the same size as the scanner bed)
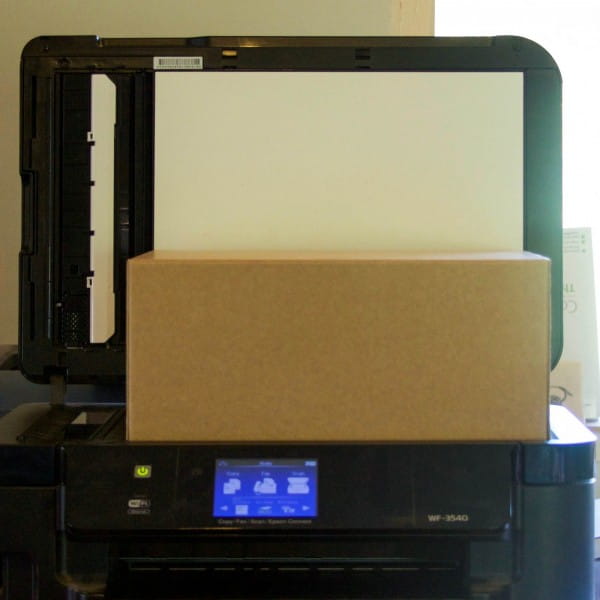
Then I hit scan.
And the photo at the top was the result - I cropped out the edges but that is all.
So now, of course, I want to have a go at scanning everything.
My youngest daughter suggested that the cat might be up for it as it involves being in a box (this is a joke - please don't report me for animal cruelty)
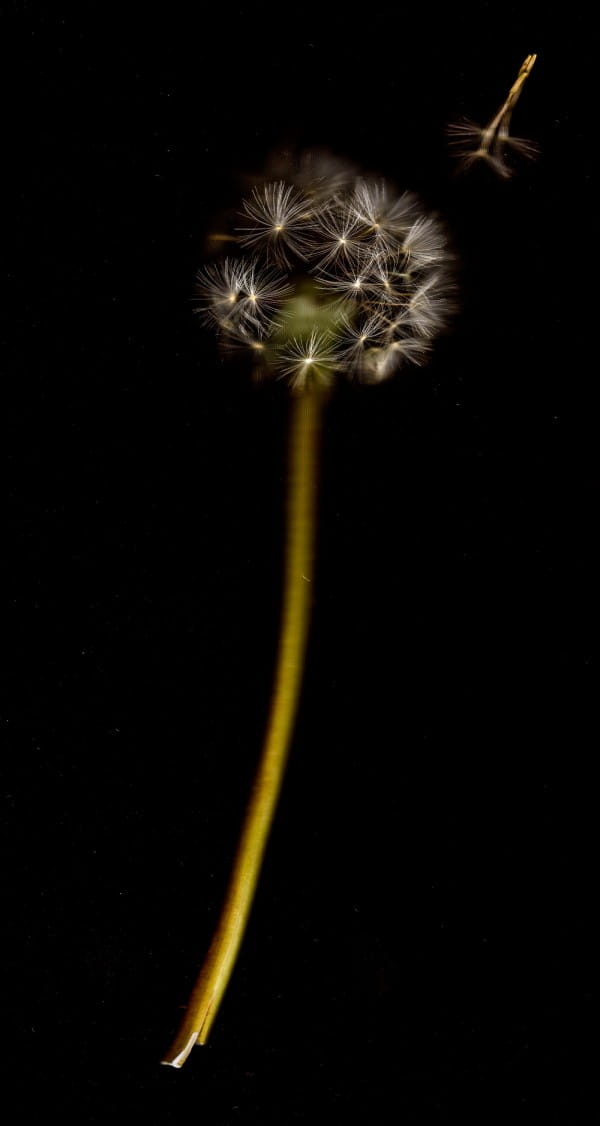
It turns out that this is a well established photographic technique that had passed me by - you can check out this article if you want to have a go at anything more complicated.
Isabel Bannerman's amazing photographs are on show here till the end of the month
I would love to see your results.
Romantic table flowers
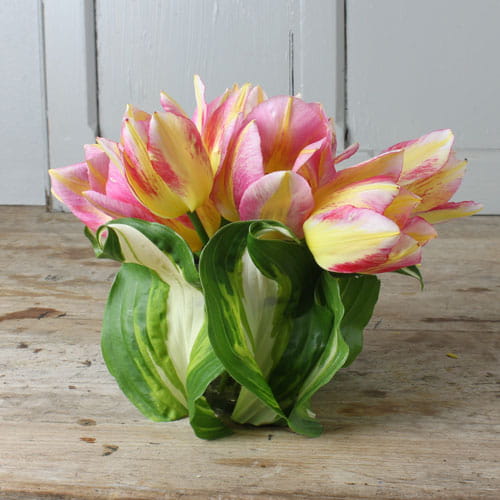
This is a brilliant way to jazz up a plain glass or jar to make a gorgeous romantic flower arrangement for an outdoor party. They look amazing lined up along the centre of a table or with nightlights dotted between them.
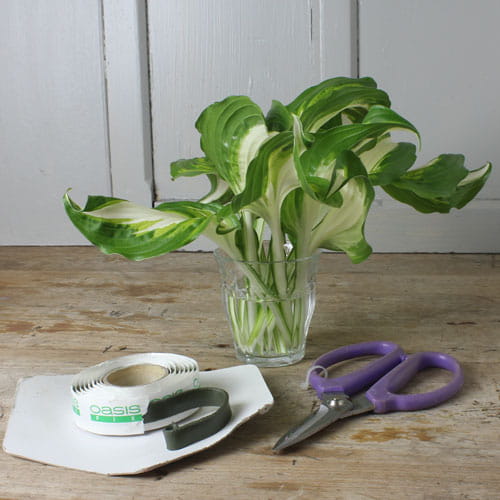
You need -
Waterproof blu-tack (or double sided sticky tape at a push)
A glass or jar
Scissors
Broad pretty leaves - I used a hosta

Cut a strip of waterproof blu tak in half lengthwise and wrap around the top and bottom of your glass.

Stick your leaves to the blu tak so that they cover the glass - squash them into it so that they are firmly anchored.

Carefully cut the stems so that they are flush with the bottom of the glass.

Fill with flowers cut short so that they balance on the lip of the leaves - the effect should be natural and not too symetrical.
I find that the hosta leaves will last a couple of days out of water - if you need the to stay perky for longer stand the arrangement on a saucer of water
The nature table windowsill.
Over the years the way I arrange flowers has changed - I used to create elaborate mixes of flowers, with lots of greenery and different types of flowers, designed to be displayed in a beautiful vase on a side table.
Now things are much simpler, my time is more valuable and I am usually looking for something quick and effective. I find my arrangements have almost become deconstructed - the finished effect owing a lot to the nature table.
My favourite is on my bedroom windowsill - shells, fossils and stones gathered on family holidays are interspersed with old glass bottles, each with a single flower or stem in it.
Each morning, as I sit in bed and drink my morning coffee, I wonder at how they change from day to day.

