Journal
Natural Dyeing with Hawthorn: Four Colours from One Tree
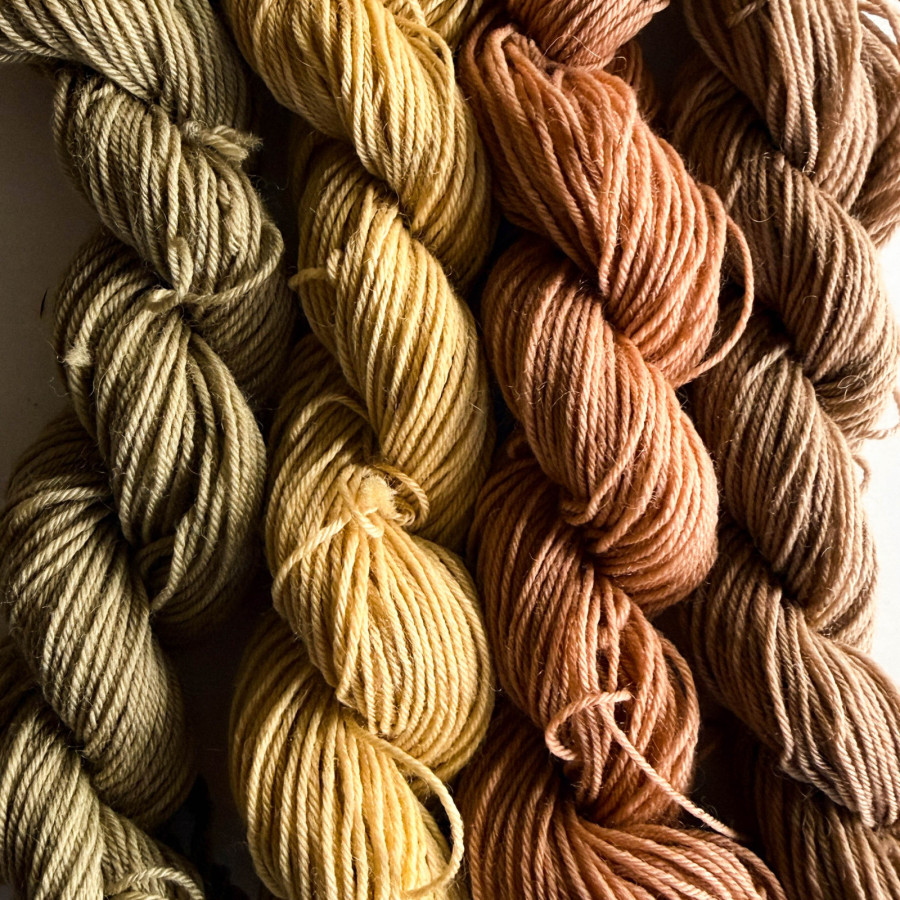
Hawthorn has been part of British life for at least 6,000 years. The pollen shows up in the record from that far back. It’s in the folk medicine, the May Day celebrations, the hedgerows, the fairy tales. One of those plants that human beings have simply always been alongside.
It’s also one of the best dye plants you’re likely to find in your garden or local hedgerow, and it gives you more than you might expect from a single shrub.
In this video I’m working with hawthorn I’ve cut from a self-seeded shrub in my own garden. By keeping the leaves and the bark from the twigs separate, and then modifying one skin from each bath with iron, I end up with four quite different colours.
Why Hawthorn Works as a Dye Plant
The leaves and the inner bark give very different results. The leaves produce yellows — a soft, mid golden yellow. The inner bark (the layer between the outer bark and the white interior wood) gives a warmer, more orange-caramel tone.
If you’re gathering from a hedge or tree rather than a garden shrub, you’d ideally strip just the inner bark from larger branches. On small thorny twigs it’s more practical to chop the twigs into pieces and work with what you can.
A word about the thorns: the leaf-bearing branches tend to sit around the spines rather than between them. You can strip leaves off by holding the main stem and drawing your hand along it. It works well and saves a lot of fiddling.
What You’ll Need
- Hawthorn leaves (fresh, not tough old ones; end-of-spring leaves work fine)
- Hawthorn twigs with inner bark (small twigs chopped, larger ones stripped)
- Pre-mordanted wool (I’m using alum-mordanted sock wool)
- Washing soda (sodium carbonate), about half a teaspoon per pan
- Ferrous sulphate, about half a teaspoon for the iron modifier bath
- pH strips
- White vinegar
- Two dye pans, one modifier bowl
Step 1: Prepare the Leaves
Strip the leaves from their stems and put them straight into your pan. Cover with just-boiled water, add a small amount of washing soda (roughly half a teaspoon), and bring to a simmer.
The washing soda makes the bath alkaline. This matters because simmering plant matter naturally acidifies the water, so you’re just counteracting that a little. It also seems to help bring out yellow tones.
Simmer for around 20 minutes, then let it cool. Reheat, cool again, and if you can leave it to steep overnight you’ll get a richer colour.
Step 2: Prepare the Bark
Separate your twigs from any leaves, leaves going into the leaf pan, twigs into their own pile. On larger pieces, try to scrape off the outer bark so you’re left with just the inner layer. On smaller twigs, chop them into pieces; there’s no need to be precise.
Add washing soda (a full teaspoon this time, as the cell structure of bark needs more help), cover with boiling water, and you’ll likely see colour coming out almost immediately.
Leave this one for at least 24 hours before straining.
Step 3: Strain and Check pH
Strain both baths and discard the plant material. The leaf bath will be a warm golden colour. The bark bath should be a rich orange-brown.
Check the pH of both. After steeping, the bark bath in particular is likely to be quite alkaline, around 10. Add white vinegar, a little at a time, until it comes back to neutral or just slightly acidic. Don’t do this while the liquid is hot.
Step 4: Dye the Wool
I’m using pre-mordanted sock wool, two skeins per bath.
For the leaf bath: soak your wool, squeeze it out well, and lower it into the warm dye bath. Bring the temperature up to a comfortable hand-hot (not simmering, definitely not boiling) and hold it there for about half an hour. The colour should transfer well at this temperature without risking felting or damage to the fibre.
For the bark bath: the same process. The colour tends to be more concentrated, so you may see a bigger change in the dye bath as the wool takes it up.
Leave one skein from each bath undipped in iron. These are your base colours.
Step 5: Modify with Iron (Saddening)
The process of using iron to shift a colour is called saddening. It darkens and dulls the original colour, which sounds less appealing than it is. The results are often the most interesting of the four.
Dissolve about half a teaspoon of ferrous sulphate in a bowl of water. The granules are mint green and dissolve quickly.
Take one skein from the leaf bath, squeeze it well, and lower it into the iron bath. The colour shifts almost immediately toward green-grey. Keep an eye on it; it doesn’t take long. Once you’re happy with the colour, move it to a rinse bowl.
Do the same with the skein from the bark bath. This one moves toward a warmer, darker brown.
One note: keep your iron solution well away from your undipped skeins. Iron spots are very hard to remove, and a splash can leave permanent marks. Use a separate stirring stick for the iron bath.
The Four Colours
From this one plant:
- Leaf, no modifier: soft golden yellow
- Leaf, iron modifier: green-grey
- Bark, no modifier: caramel orange-brown
- Bark, iron modifier: warm mid-brown
Plant dyes are always subtle. You can push the iron further and get darker results, but the more iron you use, the more you risk degrading the fibre over time. A little goes a long way.
A Note on Hawthorn
I dye with native plants whenever I can, but hawthorn is one I particularly like working with. Something about the depth of its relationship with people here, 6,000 years of entangled life, medicine, superstition, celebration, means that wearing something dyed with it feels like wearing something of this place.
The skeins I’ve dyed here are going into a pair of striped socks, alongside nettle-dyed wool from an earlier session. I’ll show you those when they’re finished.
Marie Antoinette Style at the V&A: A Close Look at the Textiles
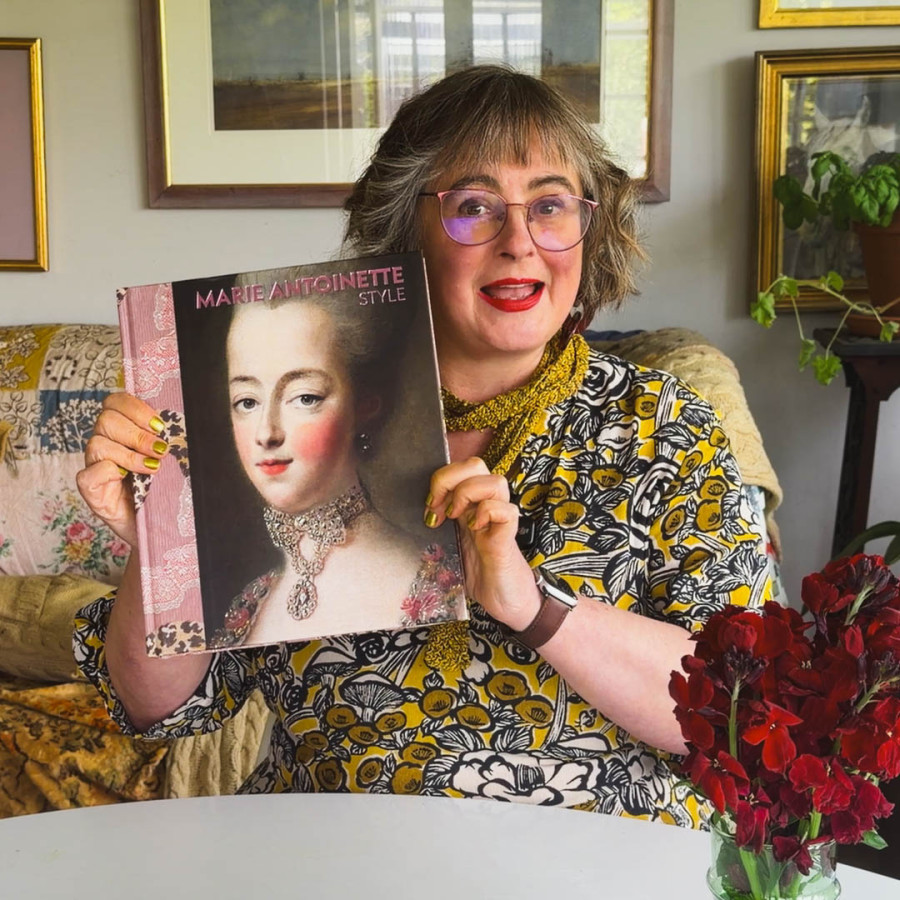
I went to this exhibition expecting to be mildly interested. Eighteenth-century French court life is not really my territory. Too gilded, too tragic, too far from the making practices I usually spend time with.
I came out genuinely fascinated.
Almost nothing in the exhibition is confirmed to have belonged to Marie Antoinette herself. What the V&A have done instead is gather textiles and dress from other collections that are close enough to what she would have worn, and the effect is remarkable. It stops being a relic show and becomes something full of life and extraordinary craft skill.
What I focused on
I decided to ignore shoes, fans, jewellery, and the execution galleries entirely, and spend my time with the fabrics and dress. There is a lot to look at: state dress with silver-wrapped embroidery so heavy it must have been nearly impossible to walk in; the painted warp silks she favoured for daily wear; a commission sample that makes you understand immediately why her annual dress budget topped the equivalent of £1,500,000
The film goes through the pieces in some detail.
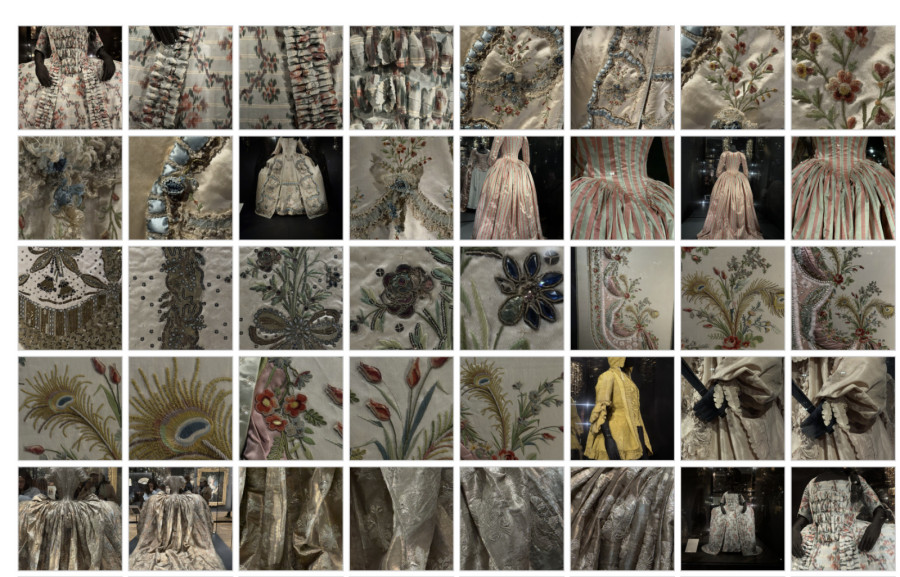
The Gallery of photographs
I took a lot of close-up detail shots while I was there. The embroidery and fabric construction really only make sense at that scale. You can click through and browse at your leisure.
They Called It Matrons Wear: What 1950s Knitting Patterns Told Women to Be
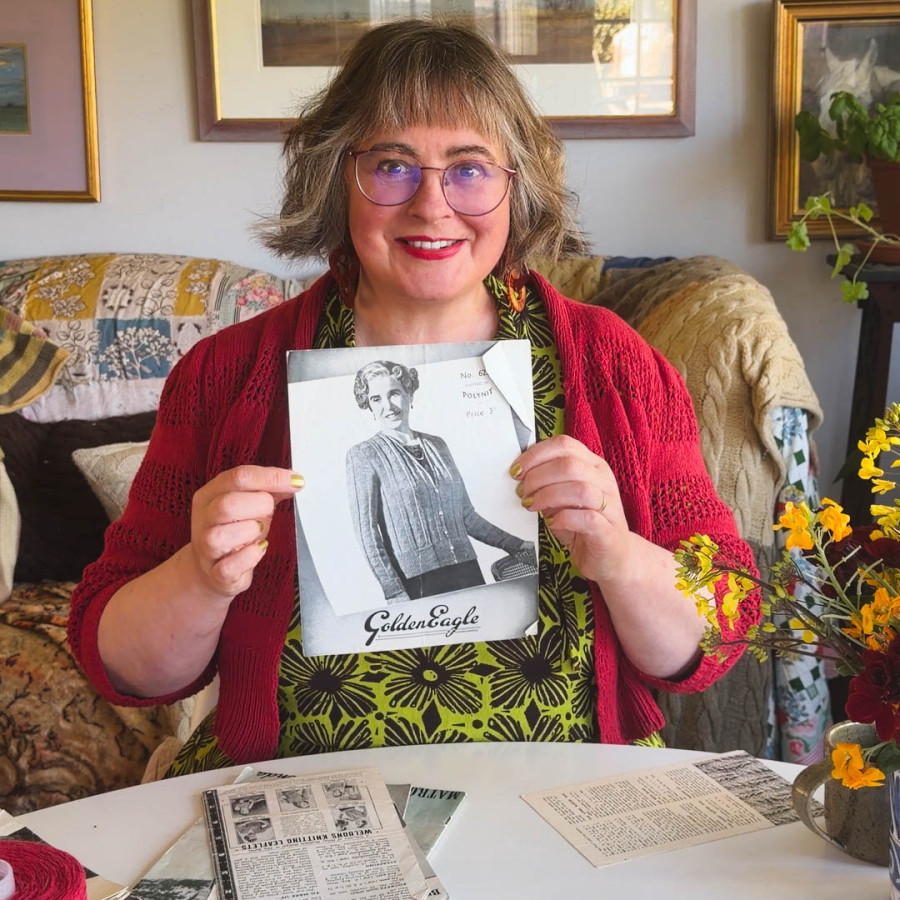
I needed a cardigan to go over a summer dress. That’s where this started.
The dress is a Toast folk print, a really rich brown base with bright reds, greens and yellows, and it’s fitted, with a side zip and a high neck. When I bought it I imagined wearing it like a pinafore, with stripy sleeves poking out underneath. But when I tried it on that way I looked, as I can only describe it, like a sausage roll. Trussed up. So I decided I needed something to go over it instead. Something lightweight. Not a woolly cardigan. A summer cardigan.
I had some very fine red cotton in my wool store, slightly dulled, which I love, and I thought I’d double it up and see what I could make with it.
Why a 1950s Pattern?
I’ve always been drawn to 1940s and 50s styling. It suits my shape. I have a waist, I have big hips, and that era of dressmaking understood that. Neat shaping. A defined silhouette. I like knitting with seams and from the bottom up, which I know makes me quite unusual in current knitting circles, but it’s how these older patterns work and I find them satisfying.
So I’ve been collecting original knitting magazines from that period. Not downloads, the actual magazines. When you hold the originals, you get so much more than just the pattern. You get a sense of how women fitted into society at the time. What they were expected to look like. What was considered suitable.
And that’s where things get interesting.
The 34 Inch Bust Problem
Most 1950s knitting patterns go up to a 34 inch bust. If you want to knit something vintage and you’re not a size 10, you run into a wall quite quickly.
This isn’t because women in the 1950s were all tiny. Look at photographs from the period and they clearly weren’t. What was happening was partly that women then knew how to redraft a pattern. They could take something sized for a 34 inch bust and rework it as they went for a 44 inch bust. That skill existed and was widely used. It’s largely gone now.
But there was also a separate category entirely. Patterns for what the magazines called the fuller figure. And these were marketed quite specifically at older women, described without any apparent irony as matrons.
Matrons Wear in Lavenda Wool
The book I found is published by Lister & Co, a Bradford wool company, and it’s called Matrons Wear in Lavenda Wool. One shilling and sixpence. There’s a woman on the cover who doesn’t look particularly matronly. She has pearls and a bunch of flowers. Inside, the patterns are named after castles and illustrated with little line drawings. Bed jackets. Sturdy-looking suits. And almost everything has that quality that Joyce Grenfell captured perfectly in her dance sketches: “stately as galleons”.
Corseted. Covered. Conservative.
You can feel the expectation in the styling. Under 40 and you’re shown in fitted sweaters, leaning back slightly, a little seductive. Over 40 and you become something else entirely. Battle dress, almost. The joy and colour and pictorial stitching that appears in the younger women’s patterns has largely vanished.
The Dress That Became a Cardigan
But tucked in among the stately galleons, I found this dress.
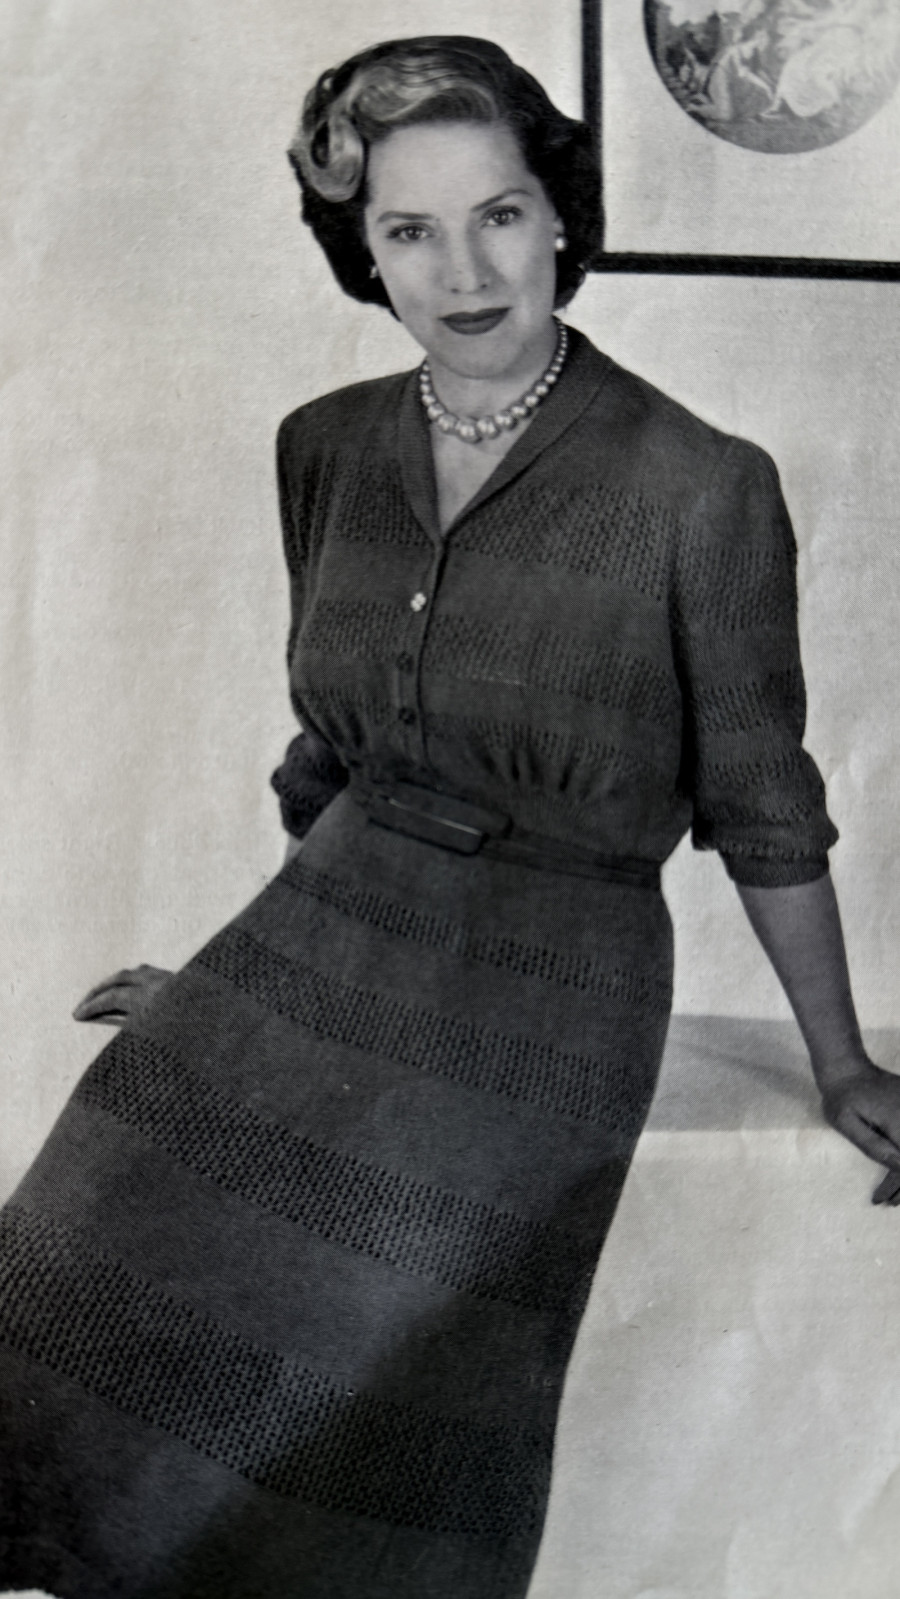
She does look quite foxy, the woman modelling it. It’s got lace panels in the skirt, three-quarter length sleeves, simple buttons at the top, neat shaping. And I thought: that would be exactly what I’m looking for if it were a cardigan.
So I adapted it. Instead of following the skirt, I added a deep single rib welt at the bottom. Everything else I kept largely as it was.
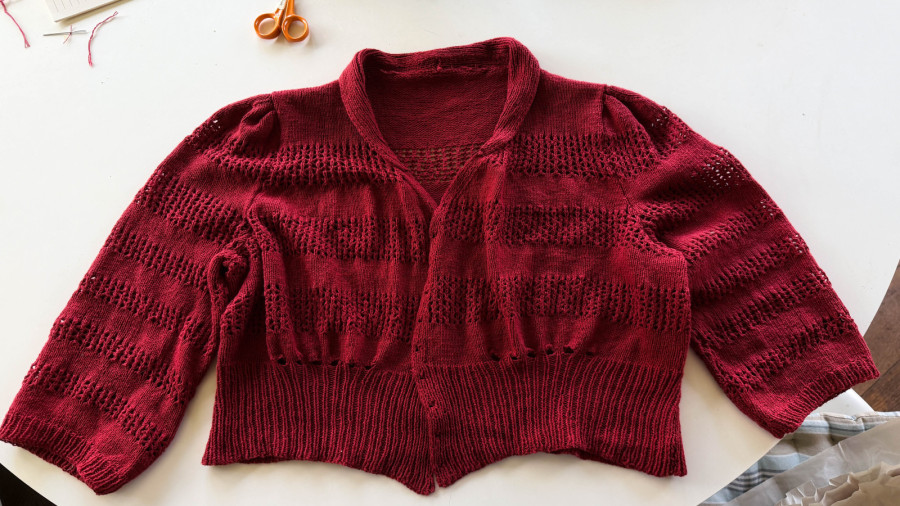
It’s a size 40 inch bust, uses 10 and 12 needles, and the original calls for Lavenda crochet wool. I used my fine, doubled red cotton instead.
The result is very lightweight, you barely know you’re wearing it. It’s got the lace panels running through the body and into the sleeve, a gathered sleeve head that I’ve left without the shoulder pads the pattern calls for, and small buttonholes down the front. I’m actually not sure I’ll button it. I think it might just be nicer worn open, like a bolero.
It fits the dress perfectly.
I’ve also discovered it goes with most of the rest of my wardrobe. The slightly dulled red with a touch of black in it is very forgiving. People always say you can’t mix different reds together. I think they’re wrong.
What Happened to Older Women in These Patterns
Going through this collection, a pattern emerges. And I don’t mean a knitting pattern.
As soon as a woman in these magazines moves past a certain age, or a certain size, the styling becomes about containment. The brightness goes. The fancy stitching disappears. The message, if you read the patterns as a kind of text, is: now you dress like this.
It made me think about something we say quite easily now, that society wants middle-aged women to disappear. I understand why it feels that way. The media has always had a slightly fetishised relationship with youth. But I’m not sure general society is actually the problem.
I think some of it is something we do to ourselves. We stop wearing bright colours. We stop reaching for print and pattern and things that bring us joy in the way we might have done in our twenties. We absorb the message of the matrons wear.
And that’s the thing about being able to make your own clothes. Once you can do that, no one else gets to make that decision for you.
What the Knitting Community Got Right
Over the past twenty years or so, the knitting community has been genuinely at the forefront of changing this. Size inclusivity, age inclusivity, the idea that you can make and wear whatever you like, these aren’t just words in knitting circles, they’re real practices. Designers publishing full size ranges. Makers sharing photos of themselves in things that don’t look like battle dress.
I get messages on this channel from people who describe me as their favourite old person, which I find rather funny and also quite touching. I’m not sure I’m old yet. But I’ll take it.
Visible or invisible, both are entirely valid choices. But if you want to make things, and you want to make things that are yours, you can. You can take a 1950s dress pattern for the fuller figure and turn it into a cardigan. You can use red cotton instead of lavender wool. You can leave the shoulder pads out and the buttons undone.
The pattern as a starting point, not a set of instructions about who you are.
The Pattern
I’ve scanned the original pattern from the Lavenda book and put it here. I adapted it from a dress by casting on the 133 stitches for the back and knitting 4 inches of single rib and then following the pattern exactly. The pattern has the fronts joined together with a waistband and worked in two parts from that. I separated them, casting on 66 stitches, working 4 inches of rib and then P28 (cast on 6 sts., P3) six times, P11, (p1,k1) three times. I made the button band single rib rather than moss stitch.
It’s out of copyright. It’s yours if you want it.
How to Dye Wool with Nettles
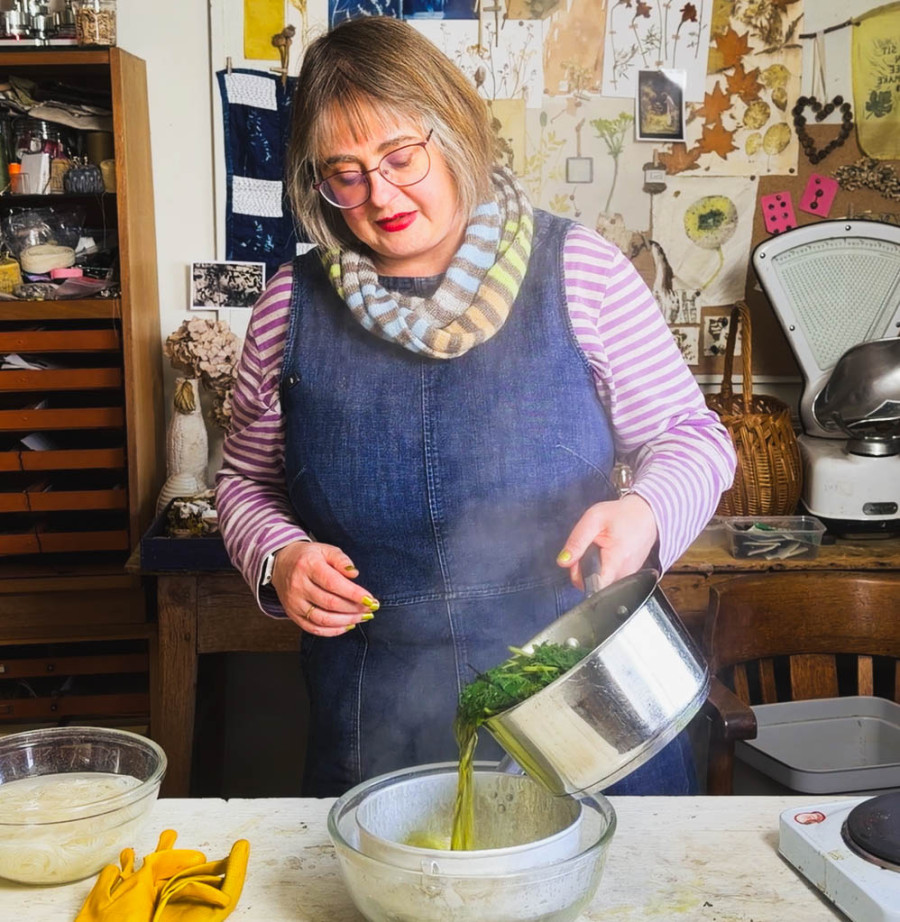
Nettles are one of the most useful plants in any dye garden, and one of the most underrated. They won’t give you a vivid, saturated colour. What they will give you is a soft, useful yellow-green that, with a quick iron modification, shifts into something really lovely: a pale pistachio, a grey-green, a colour that works quietly alongside everything else.
Here’s how I do it.
What you need
- Fresh nettles (I used 138g of leaves for 40g of wool, roughly 1:3 plant to fibre)
- Pre-mordanted wool (I used alum mordant - see the mordanting video in the playlist)
- A dedicated dye pan
- Washing soda
- pH indicator paper
- White vinegar
- Ferrous sulphate (iron) if you want to shift the colour
Gloves for picking the nettles. After that, once they’re in hot water, the sting is gone.
Step 1: Prepare the nettles
Pick your nettles and leave them on a path or flat surface for a few minutes. This gives any creatures a chance to get out before they go into the pan.
Add them to your dye pan. Don’t worry about packing them in perfectly.
Sprinkle over about half a teaspoon of washing soda. This is optional but useful: as the leaves boil, they tend to become acidic, and a small amount of alkali keeps things neutral. You don’t want an acidic bath for wool.
Pour over enough hot water to cover the leaves. I use a recently boiled kettle to speed things up.
Step 2: Simmer
Bring to a simmer, turn the heat to its lowest setting, put the lid on, and leave it for around 20–30 minutes. You’re looking for a bright, fluorescent green in the water. That’s your dye.
Don’t boil it for hours. The longer you go, the darker and duller the colour gets.
Step 3: Strain and check the pH
Strain out the nettles and compost them. Pour the dye liquor into a bowl.
Check the pH with indicator paper. You’re aiming for neutral; around 7. Because of the washing soda, it may read slightly alkaline (8 or above). If so, add a small splash of white vinegar, stir, and test again. Keep going in small amounts until you reach 7.
This matters. Wool goes into an alkaline solution and the fibre tightens up, the scales lift. It becomes harsh. You want neutral before your fibre goes in.
Let the bath cool until it’s hand-hot before you add your wool.
Step 4: Add the wool
Take your pre-soaked, pre-mordanted wool (it should have been sitting in plain water so it’s thoroughly wet through). Squeeze it firmly, submerge it in the dye bath, and let it go. Squeezing first pulls the water out and lets the dye in.
You’ll see colour taking immediately.
Leave it for a couple of hours. I don’t heat it further at this point, I just let it sit in the hand-hot water and work slowly. For nettles, I want to keep the colour as fresh as possible, so I don’t push it.
Step 5: Rinse (or modify with iron)
If you want a plain yellow-green: Lift the wool out, squeeze gently, and rinse in plain water until the water runs clear.
If you want pistachio green: This is where it gets interesting.
Make up a small iron bath in a separate container: about ¾ teaspoon of ferrous sulphate dissolved in cold water. Use different gloves for this; iron stains everything. Squeeze your wool out of the dye bath, submerge it in the iron bath, and watch it shift. You’ll see it moving towards green almost immediately.
Don’t leave it too long. You’re looking at wet colour, which will lighten as it dries. I usually take it out after a minute or two. A little iron goes a long way, and too much dulls the colour and weakens the fibre over time.
Rinse thoroughly after the iron modifier. More rinses than you think. Iron needs to come out completely.
The colours you’ll get
Plain nettles on alum-mordanted wool: a soft, pale yellow with a green tinge.
Nettles modified with iron: a pale pistachio, almost mint. The two colours together are really good; exactly the kind of neutral pairing that makes other colours in a project sing.
Both of these are useful colours. Not dramatic, not vivid. But quiet and versatile in a way that bright naturals often aren’t.
Here is a download of the instructions.
This is part of the Natural Dye Plants series. The mordanting wool video is also in that playlist.
A Maker’s Wardrobe: The Embroidered Waistcoat
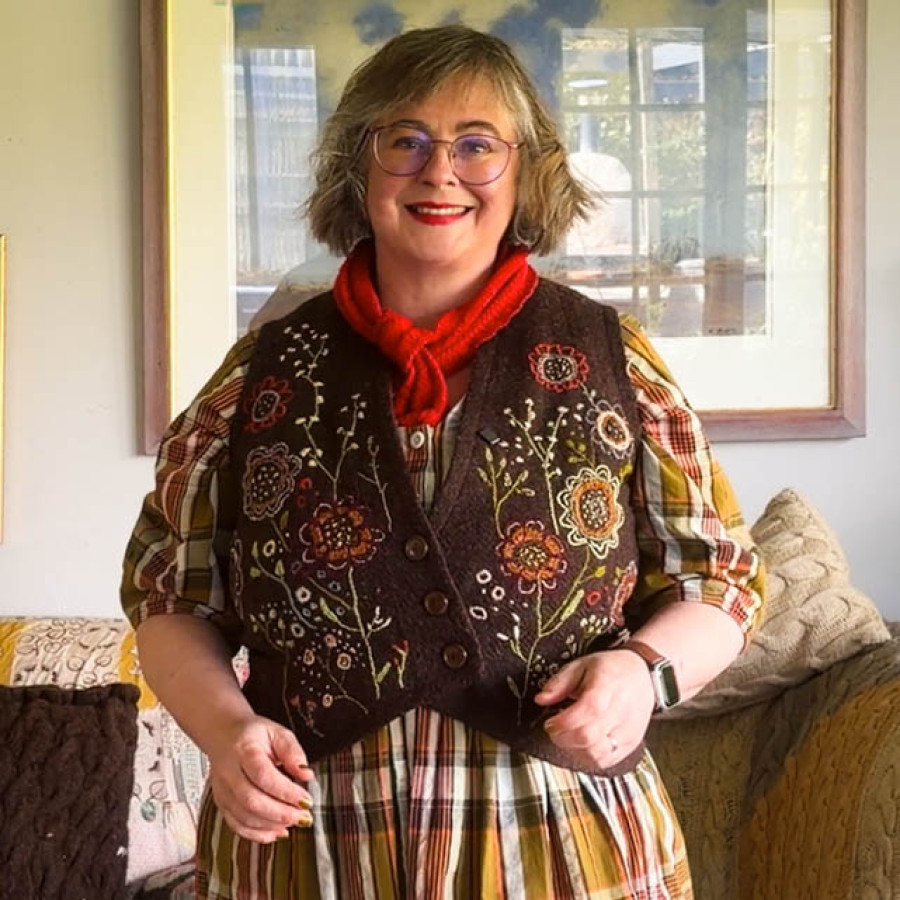
I bought this waistcoat when I was about 15 or 16, at a Phillips auction house in Edinburgh. It was the first of their fashion sales, built around a genuinely remarkable collection: Balenciagas, Chanels, the sort of thing that drew people in. Then around that core was everything else: the odd lots, the things that didn’t quite fit, the items that had come in when they announced the sale in the papers and people started clearing out attics.
I knew the people at Phillips well. My mum had opened an antique shop when I was about eight or nine, so I’d grown up in auction houses, going straight from school to help pack things into boxes, loading them onto George Street, knowing everyone by name. I think they were probably quite indulgent of a teenager with pocket money, because I managed to buy a number of those odd lots for less than a pound each.
This is why my collection of costume has some very peculiar things in it. Six Edwardian sleeves, none of them matching. That kind of thing.
The Waistcoat
The waistcoat came as part of a lot with a matching cape. It’s made of a very dark brown, open-weave Scottish tweed, bespoke-made in Mayfair, and beautifully constructed: unlined, with all the seams either finished immaculately or taped with silk ribbon, hemmed over by hand. Very simple lines. Asymmetric buttons at the front. Completely plain.
I bought it with some idea of turning into Katharine Hepburn. Very beautiful, very minimal. And then I never wore it. When I left home a few years later, it went into a case in my mum’s attic, where it stayed for decades.
When she started downsizing recently, it came back to me.
At 15, it was too big and boxy, giving me a very severe look. When I tried it on now, it was quite snug, and suddenly it’s a completely different shape. Simple still, but curved and fitted. I have genuinely grown into this waistcoat, which is a satisfying thing.
But it was still too plain for me. I kept trying it on with things and taking it off again. Something about it felt too heavy, too empty. Then I realised I’d been pinning a lot of Romanian and Bulgarian embroidered waistcoats on Pinterest, those densely worked folk pieces with flowers covering every surface. I thought: what if I tried something like that?
The Embroidery
I packed the waistcoat and a bundle of threads for a trip to Naples. I started with a white pencil, drawing flowers directly onto the cloth. No pattern, no plan, just drawing each flower as I went.
I don’t like symmetry. There’s something about it that makes me uncomfortable. With the asymmetric buttons, a symmetrical layout wasn’t really possible anyway. So I started with a flower here, a roughly corresponding one on the other side in terms of scale, and then filled everything else in around them.
The wools are leftovers, mostly from kits, things I’d accumulated. I added in some threads I’d dyed myself from the garden, a wool-silk mix, which is why they have a slight sheen. The stitches are all very simple: stem stitch, chain stitch, something approximating satin stitch, French knots, running stitch. Nothing technical. Just built up, and up, and up.
It might not be finished yet. I might add beading. But it’s in a state now where I’m wearing it, and it goes surprisingly well with a lot of things: checks, stripes, even florals. The layering of a dress, waistcoat, cardigan or jacket, and a scarf is something I love very much.
The Thing About Handwork
While I was stitching, I became aware of how much time it was taking. It’s enjoyable work, but it is a lot of time, and for something as small as a waistcoat front, that made me stop and think.
The things I’m naturally drawn to wear are things with colour and pattern and texture: embroidery, fair isle, lace, hand knitting. All of those take time. And if you love that kind of clothing and want to buy it rather than make it, you need to think quite carefully about what you’re paying.
When you buy something in a shop, 20% comes straight off for VAT. Then rent, staff, electricity, rates, marketing, styling: all of that takes roughly another 45% of what’s left. Every time there’s a middleman in the supply chain, another 50% of the remainder disappears. By the time you get down to the person who actually made the item, they’re seeing somewhere around 5 to 8% of whatever you paid. That applies from couture down through the middle market and on to fast fashion.
If you want the person who made a handmade piece to be paid a living wage, in safe conditions, the price has to be quite high. That’s not anyone being greedy. It’s just how the numbers work.
The alternative is vintage, which can also be expensive, but for good reason. Or you make it yourself, and in doing so, you also start to shrink your ideas about how many things you actually need.
What It Means to Choose Handwork
There’s a particular problem with a cheap embroidered item. If a piece of clothing costs £35 and has hand embroidery on it, the person who did that embroidery is almost certainly not being paid fairly for their time. If it’s priced as a disposable fashion item, it’ll probably be treated as one: worn for a season and then gone. The embroidery, which someone sat and made stitch by stitch, ends up in landfill.
Spend £350 on the same piece, and the maker might be getting £18. Still not a great deal, but you’re likely to treat it differently. You’re likely to keep it, mend it if it needs mending, think about passing it on.
Spend the time making it yourself, and the calculation shifts again. You know how long it took. You’re not going to throw it away. You’ll mend it, you’ll adapt it, and there’s a reasonable chance it’ll outlast you.
Those of us who love heavily decorated, layered, handworked things have to reckon with this more than people who prefer a minimal aesthetic. The things we want take either real money or real time, and if we try to get them cheaply, someone else pays the cost we should have paid.
The waistcoat took a lot of hours. I am entirely delighted with it.
Somewhere in my mum’s boxes there is also a matching cape. I haven’t found it yet.
This film is part of A Maker’s Wardrobe, an occasional series about the clothes I’m making, altering, and embroidering.
 RSS
RSS